 ThumbGlanceResizer →
YouTube thumbnail size.
1280 × 720 pixels is a 16:9 canvas and our resizer's default. YouTube now recommends 3840 × 2160 pixels for video thumbnails, also at 16:9.
Choose an image & resize →Use 3840 × 2160 →
Choose your file in the resizer; it stays on your device. The default remains 1280 × 720. Uploading 4K from a phone? Inspect the 2 MB trade-off.
YouTube lists a minimum width of 640 pixels. Keep video thumbnails under 2 MB when uploading from mobile or 50 MB from desktop. YouTube Help, read November 11, 2026 (13:23 UTC).
Preview the thumbnail size in six layouts
Load one JPG, PNG or WebP image locally, add an optional title, and compare the same six illustrative layouts used by the ThumbGlance thumbnail tester. The preview does not predict click-through rate or reproduce every YouTube surface.
Small-size blur check
- Load your own image or the sample.
- Select Sidebar, then compare it with Desktop and Shorts.
- Open all six layouts and complete the three manual review rows.
- Download the 1800 × 2020 PNG review sheet and inspect the actual exported file.
The exported sheet is a review image, not a thumbnail to upload to YouTube. A small preview can reveal soft lettering or a lost subject, but this check does not score blur or judge composition automatically.
Enlarged inspection view · not actual display size. Compare all layouts for small-size readability.
4K under 2 MB: inspect what compression changes
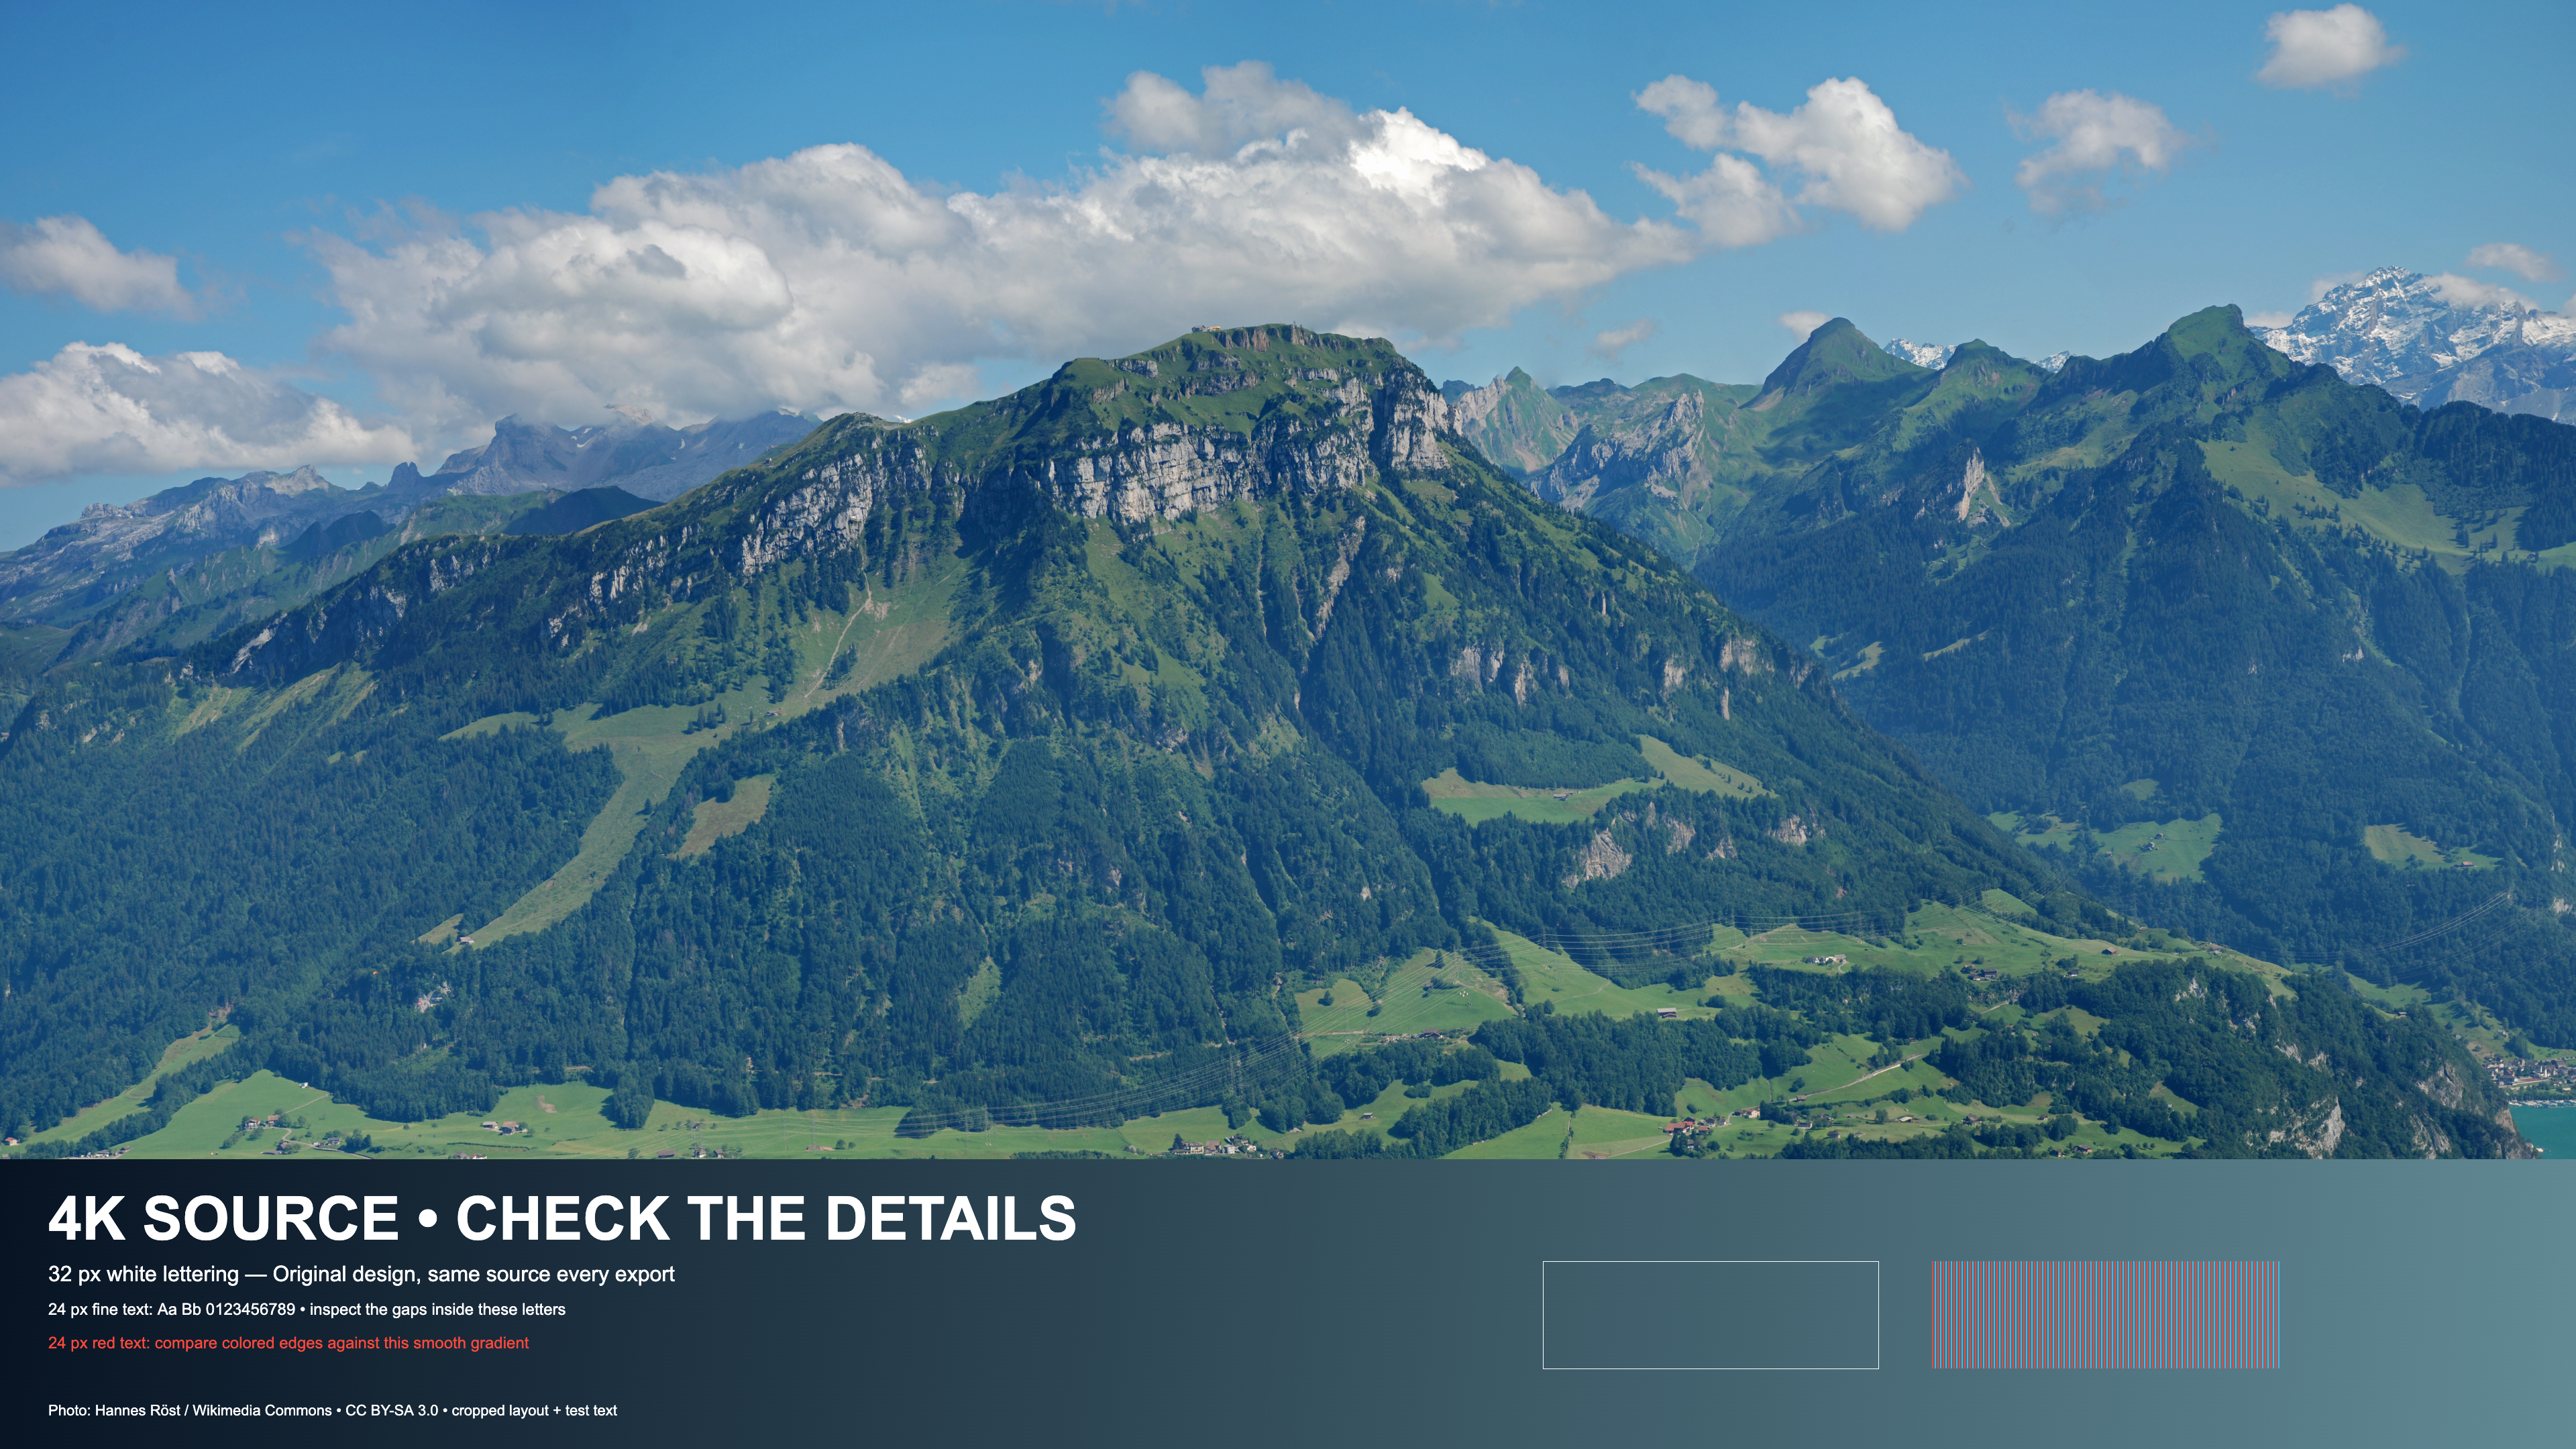
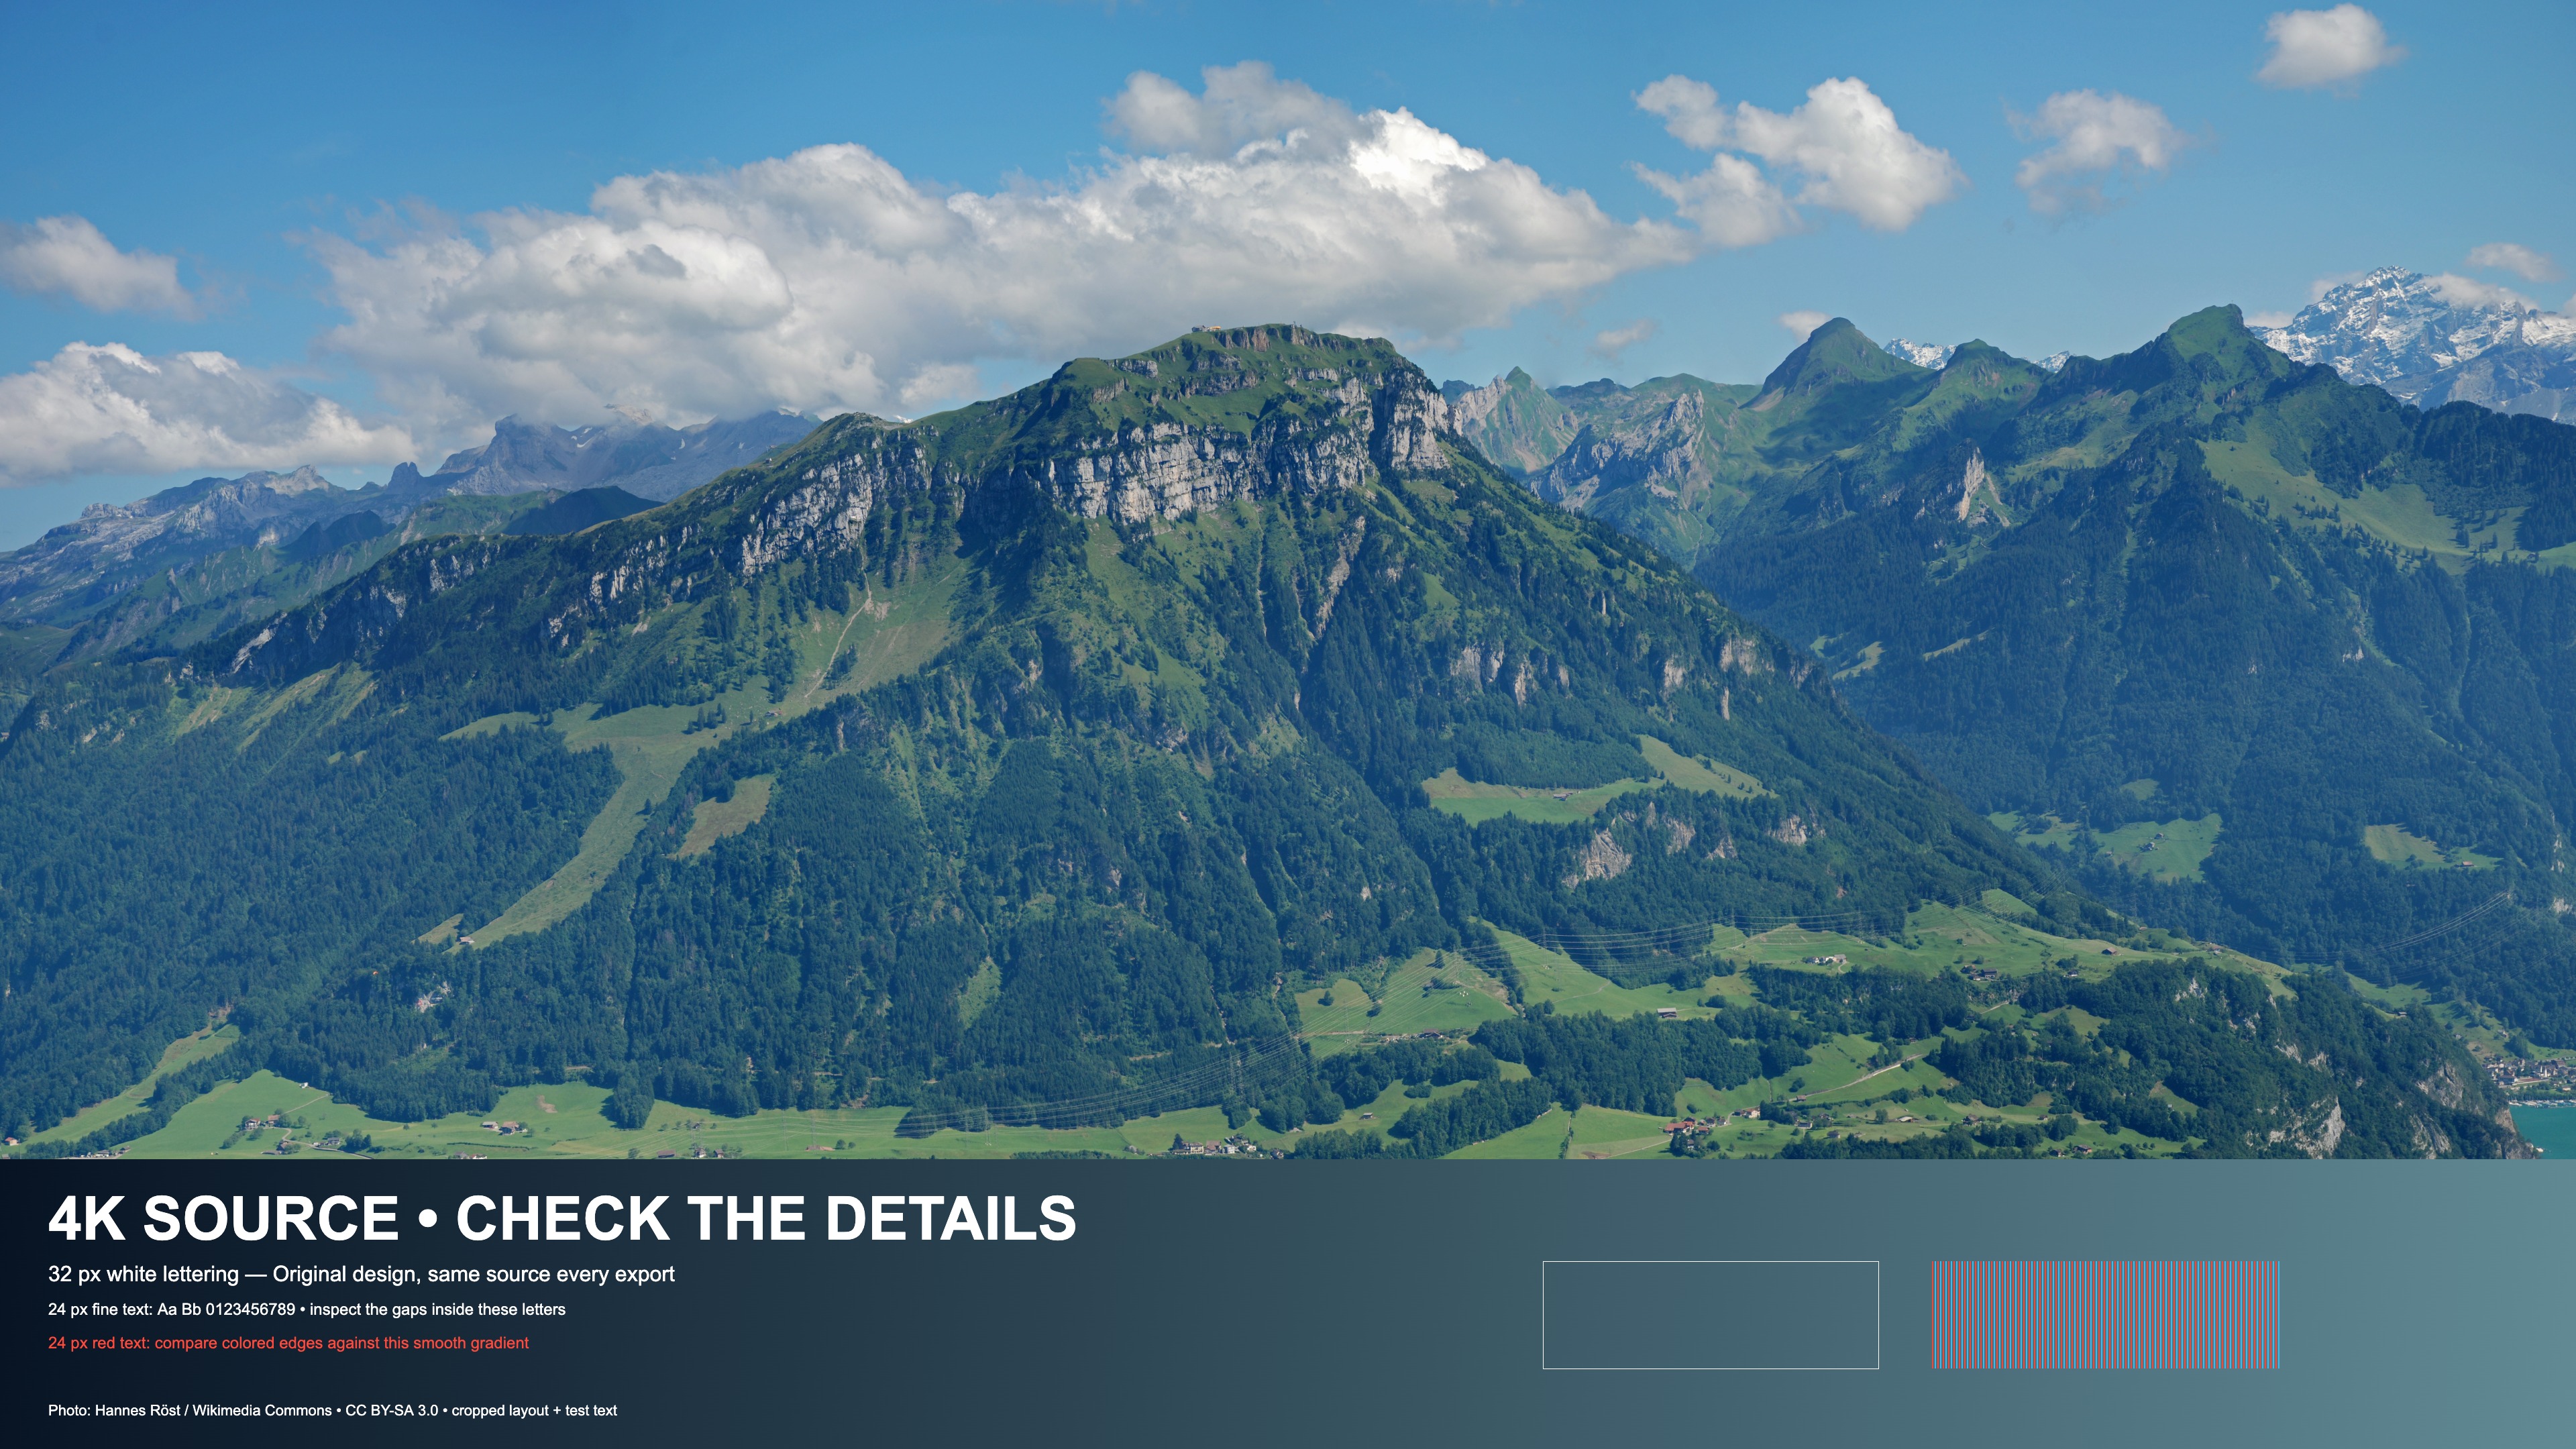
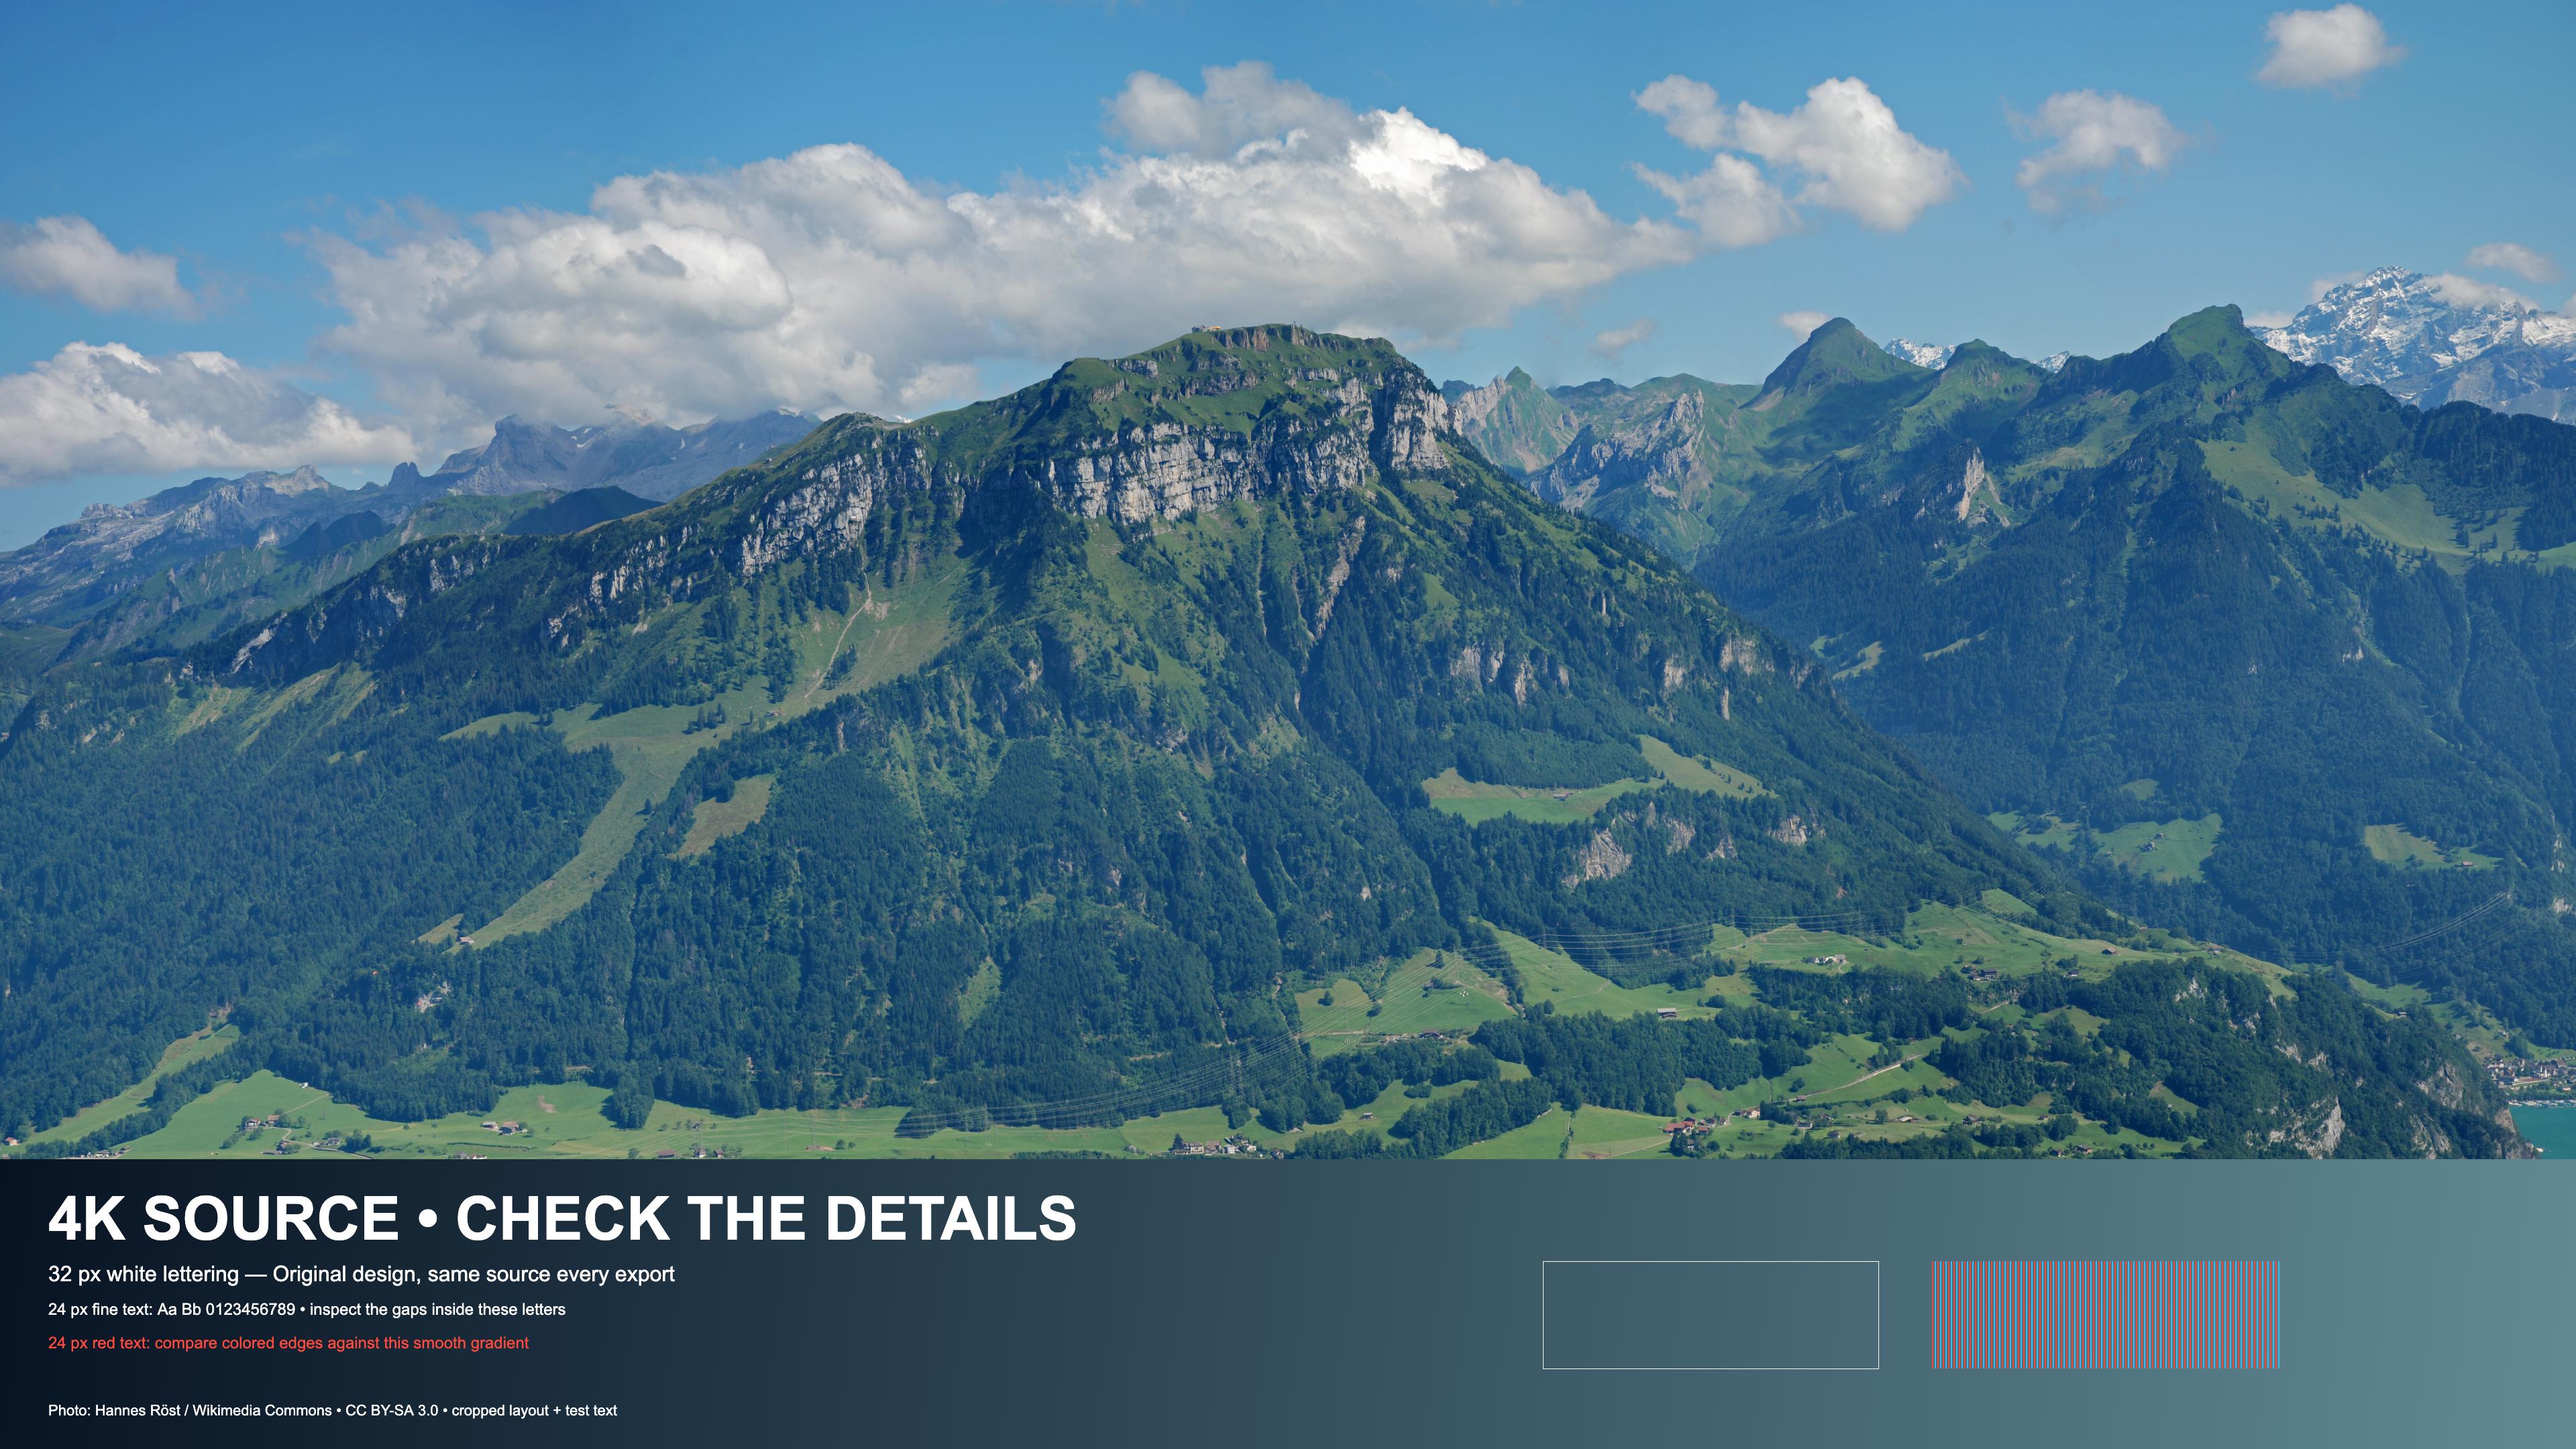
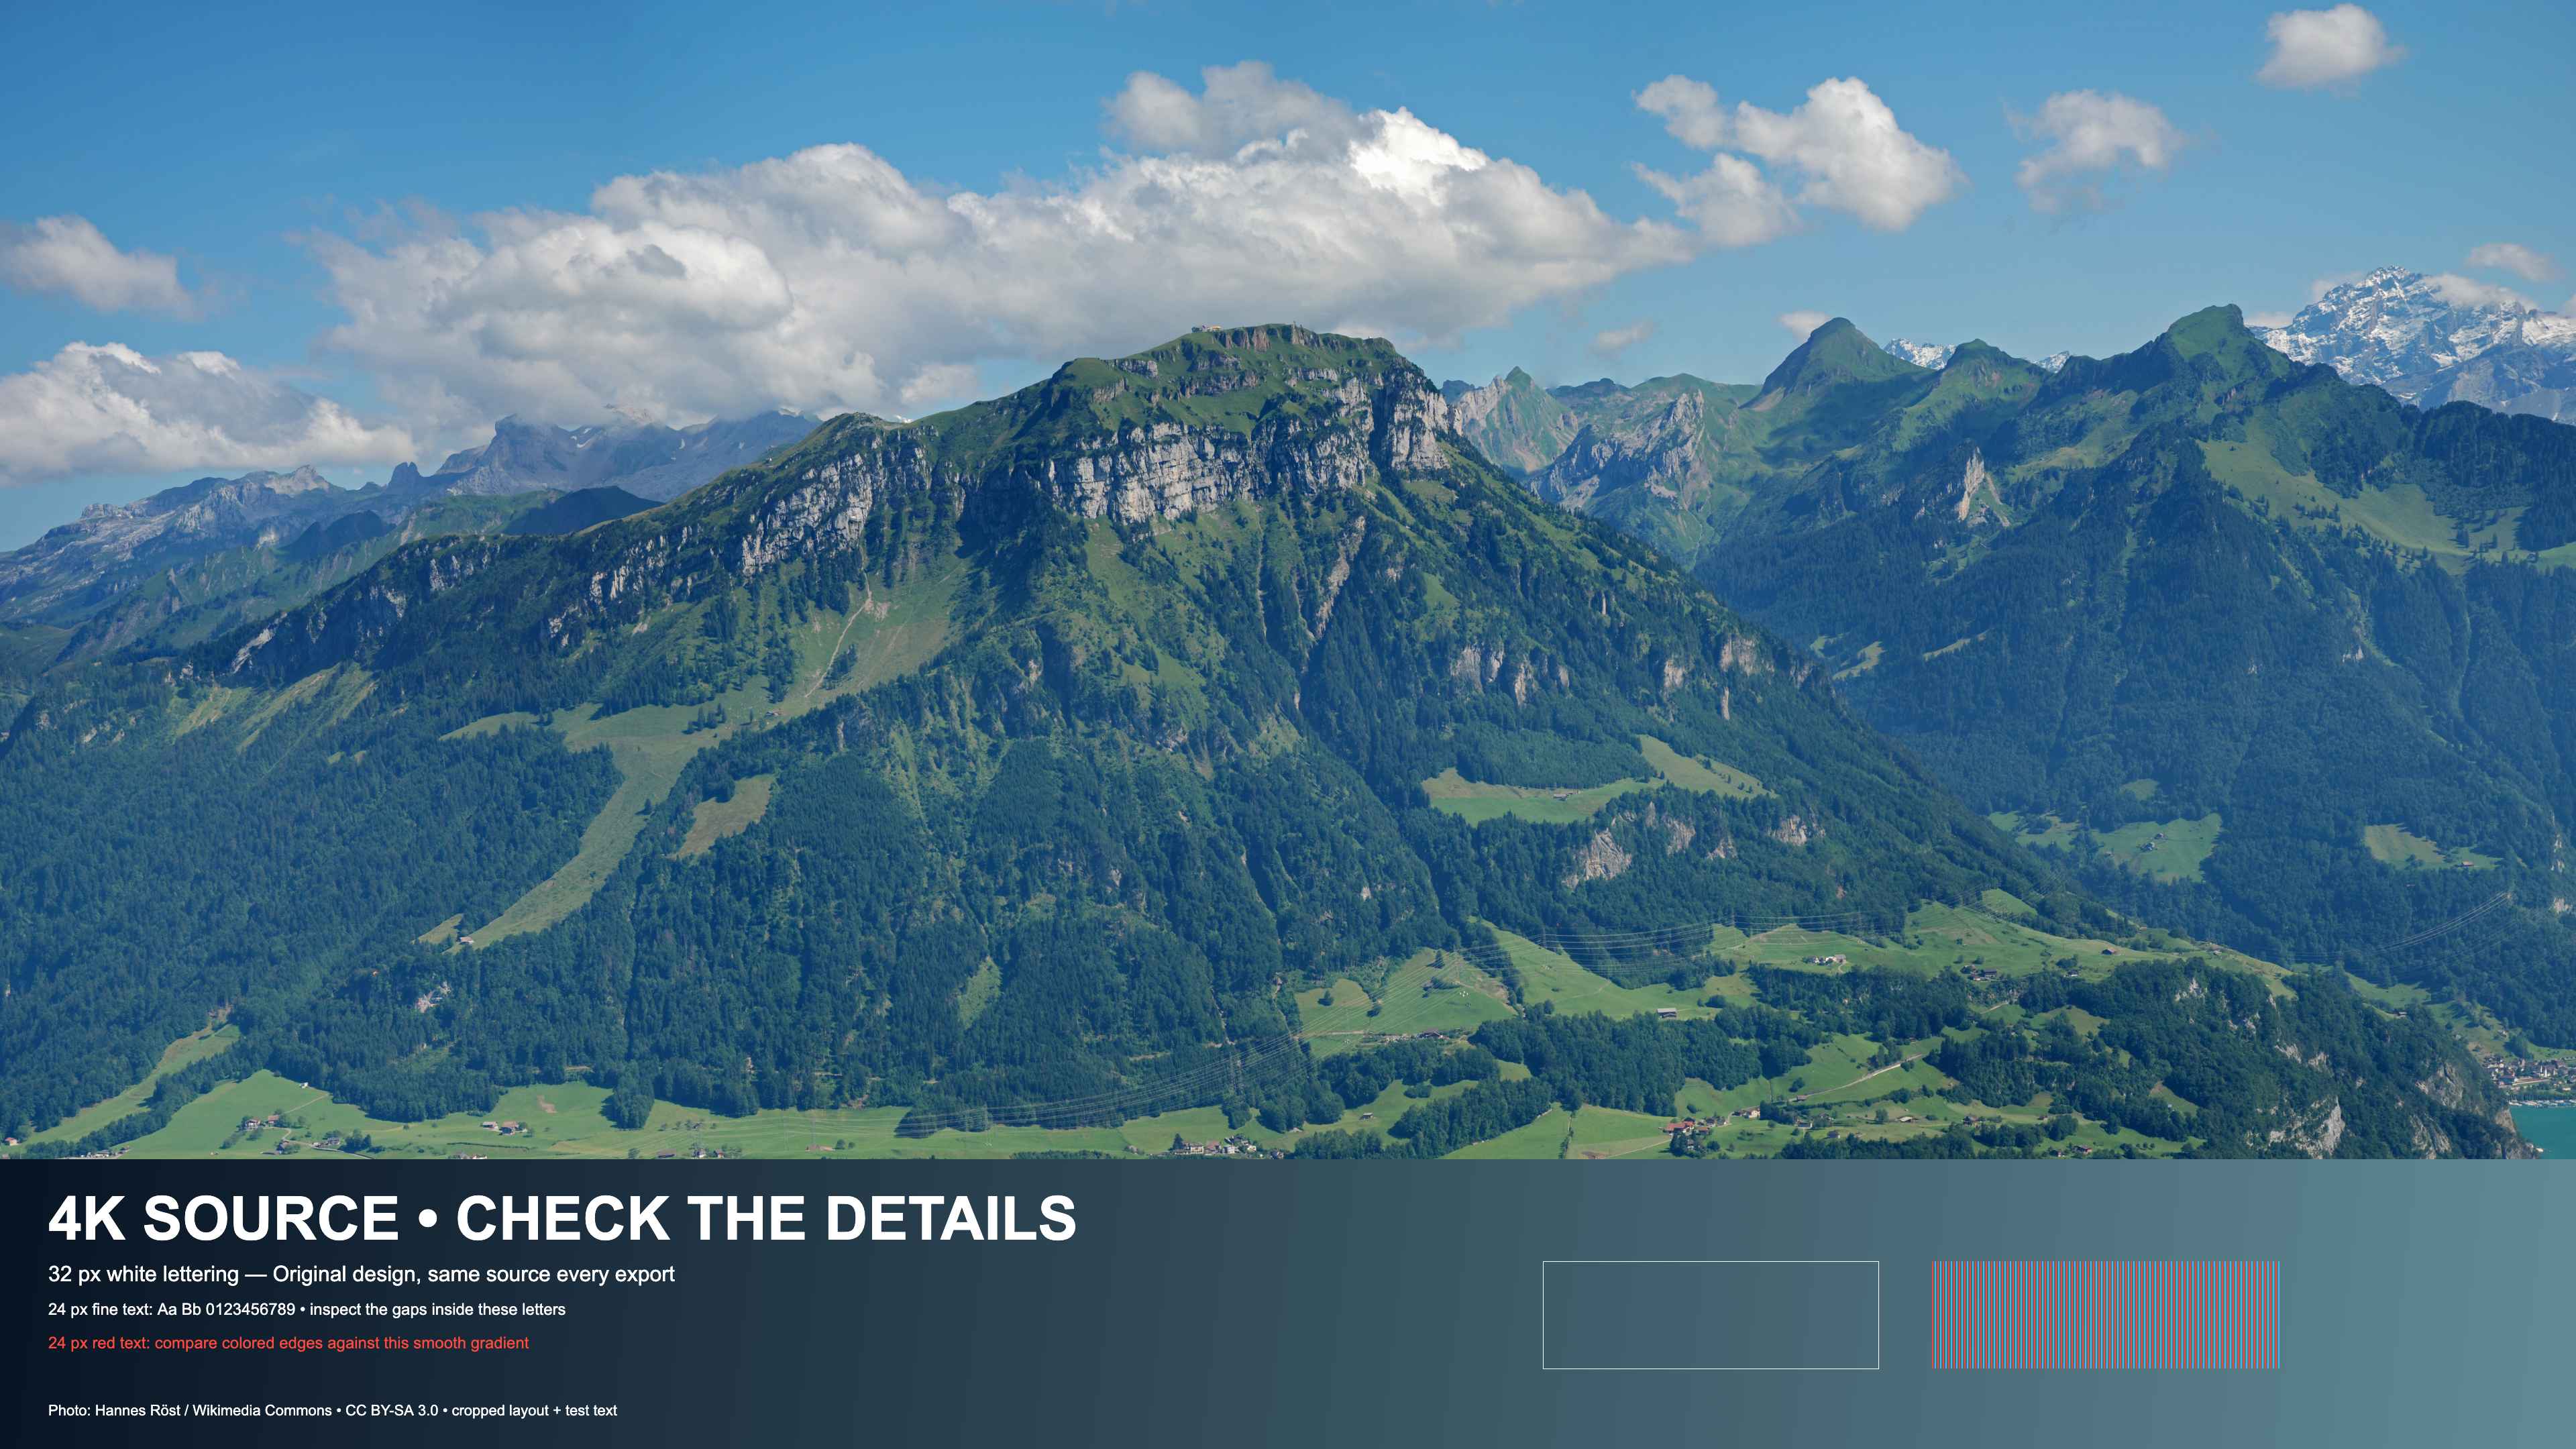
Keep the 3840 × 2160 canvas and lower JPG quality only as far as needed. In our single 4K test card, quality 0.92 produced 1,736,585 bytes, below our conservative 2,000,000-byte mobile check. Quality 1.00 produced 8,157,878 bytes at the same dimensions. Pixel dimensions alone do not determine file size.
| JPG quality / file | Actual bytes | Below 2,000,000 bytes |
|---|---|---|
| Quality 1.00 | 8,157,878 | No |
| Quality 0.92 | 1,736,585 | Yes |
| Quality 0.75 | 879,307 | Yes |
| Quality 0.40 | 471,869 | Yes |
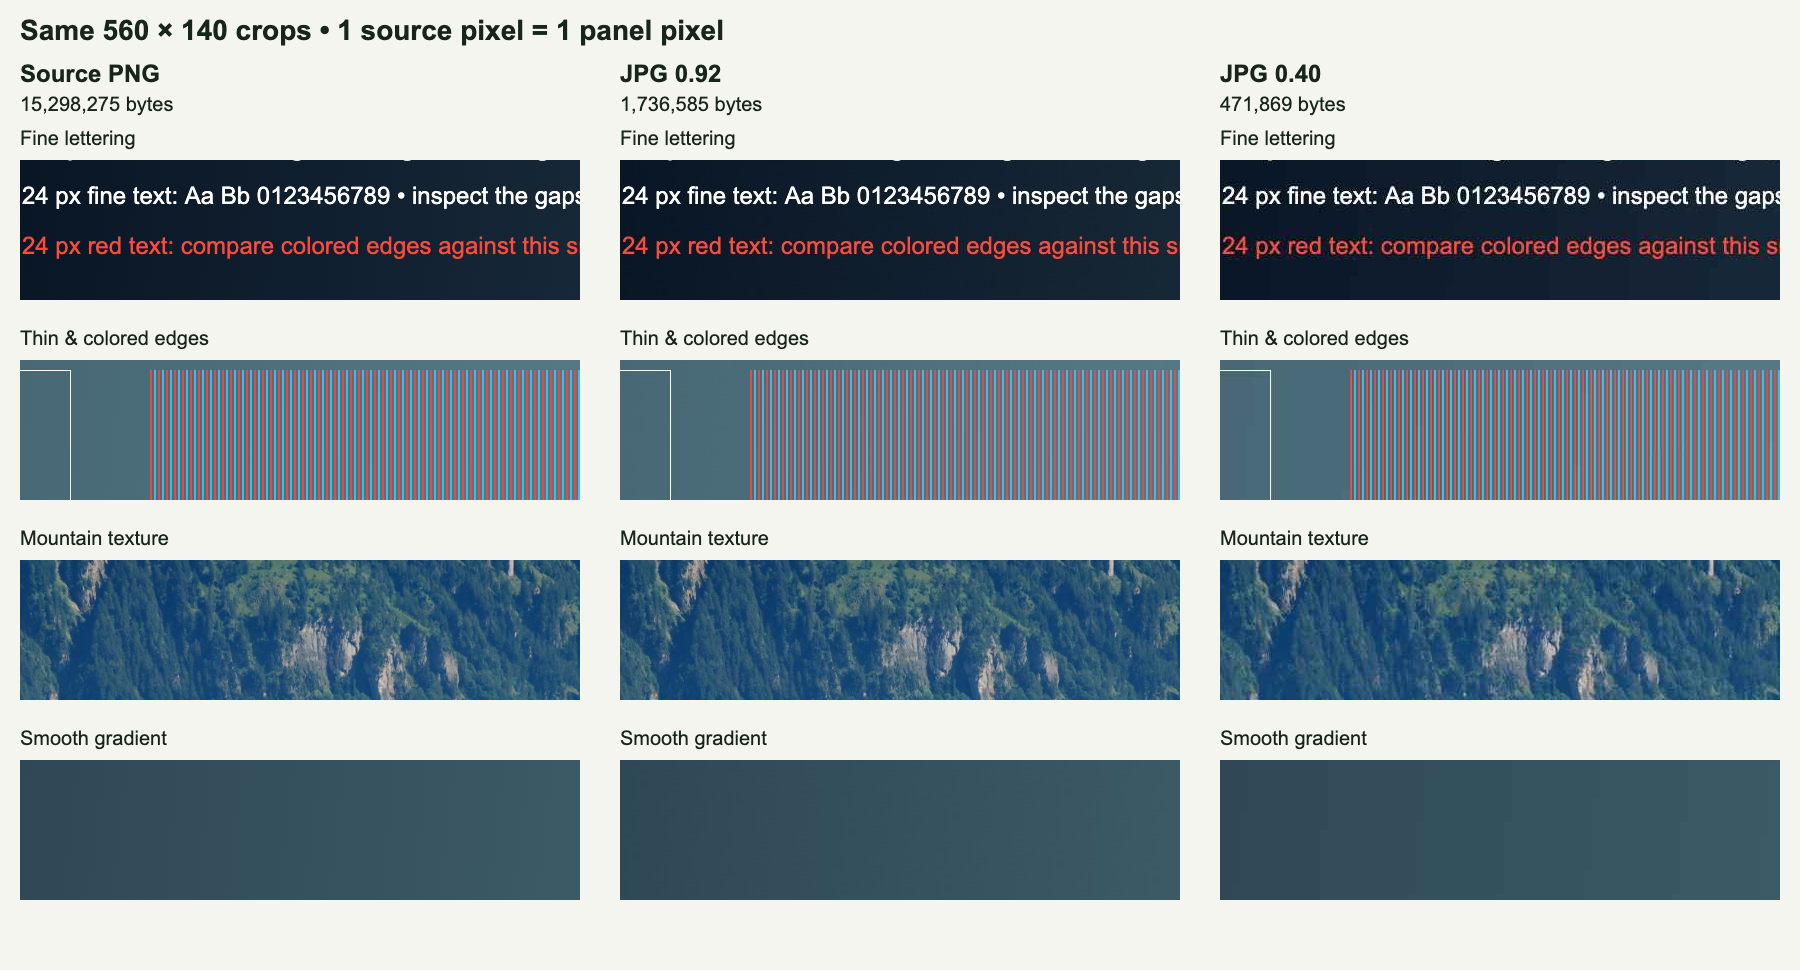
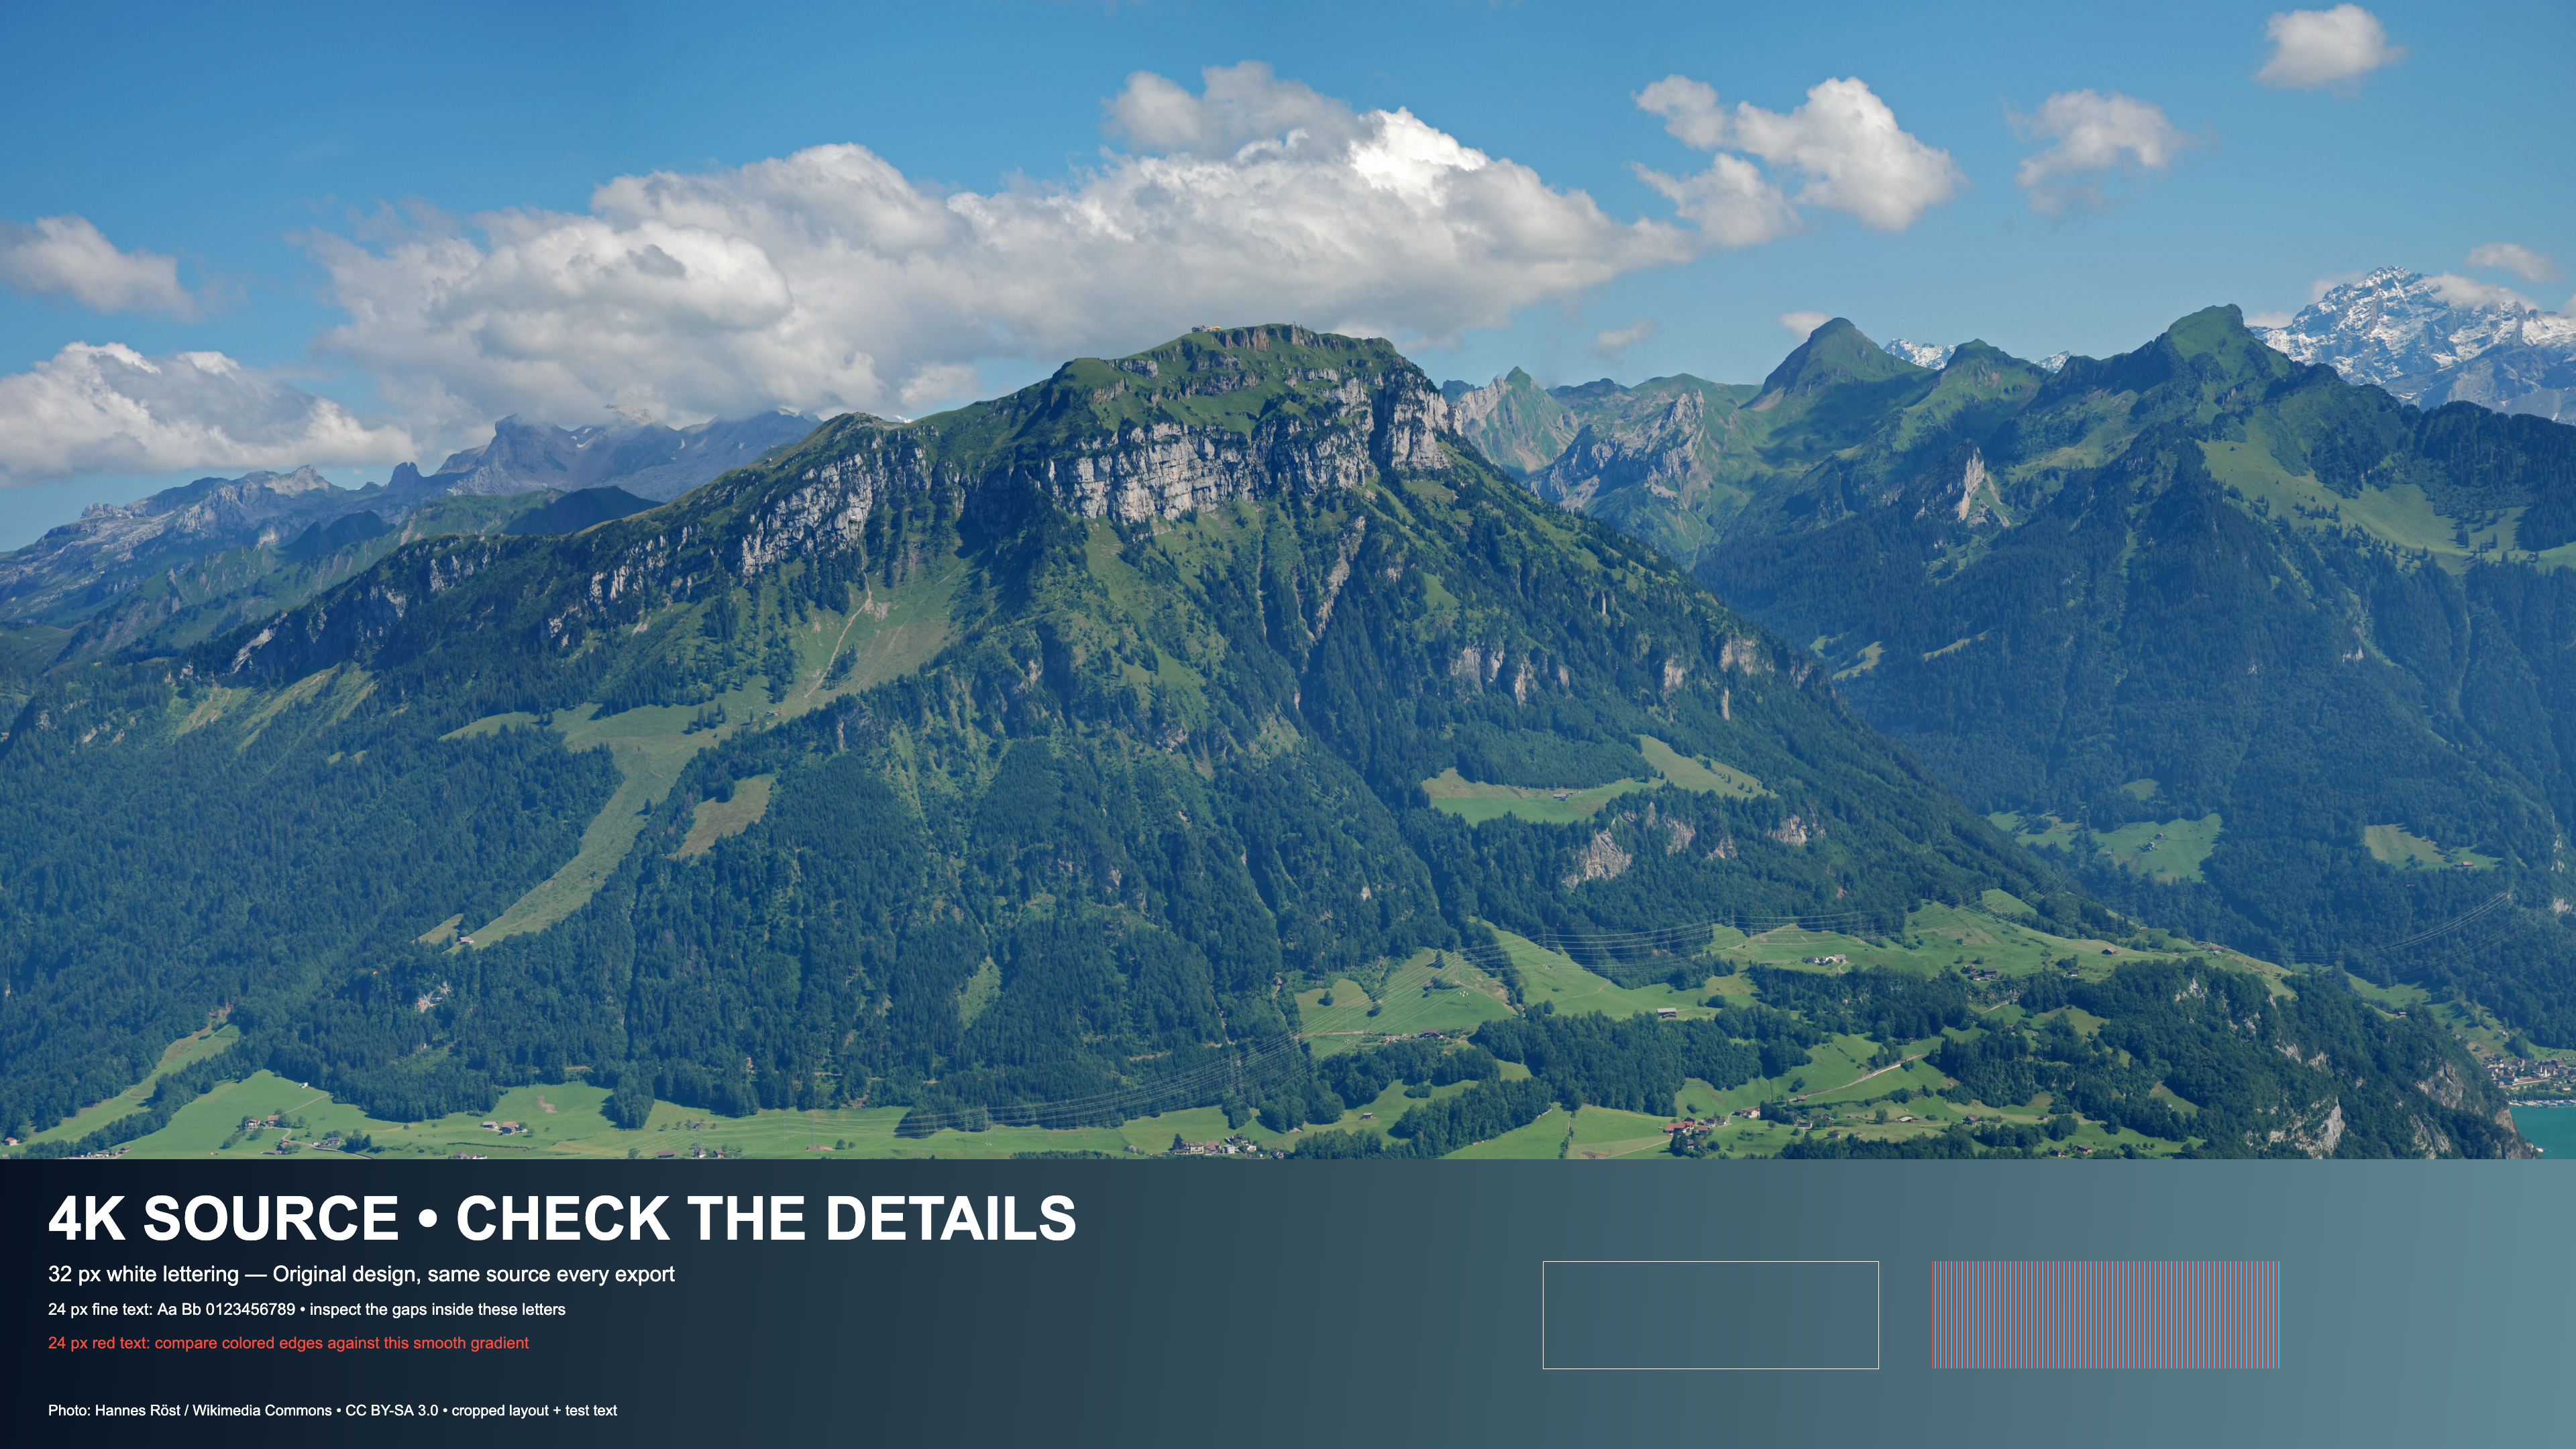
At 0.92, fine white text and mountain texture remain close to this source, but red text and the colored stripes already look softer. At 0.40, lettering has visible noise around its edges, mountain texture is less distinct, and the smooth gradient shows bands and blocks. Both files pass the byte check; the smaller one gives up more visible detail.
- Open the thumbnail compressor, choose your image and keep Original dimensions.
- Choose JPG. Start at 0.92 and check the actual bytes. Reduce quality in small steps only if the file is still at or above 2,000,000 bytes.
- Download the result. Inspect small text, colored edges, textured areas and gradients at 100%, then check the small preview above. If damage becomes visible, simplify the artwork or test a smaller canvas and compare again.
The 2 MB limit applies to video thumbnails uploaded from a phone. YouTube lists 50 MB from desktop; a desktop upload does not need this mobile byte target. See YouTube Help.
Source, method and limits
Download the 4K source PNG (15,298,275 bytes) or measurements and crop coordinates. This card combines a cropped, downsampled photograph with native 24 px text, thin lines and a gradient. It does not enlarge our older 1280 × 720 compression samples.
Photo: Fronalpstock big.jpg by Hannes Röst, CC BY-SA 3.0. ThumbGlance cropped and resized it and added test elements. The source card, JPG derivatives and crop comparison use the same license. The photograph was already a processed JPEG; the PNG preserves the composed card, not an uncompressed camera original.
Each JPG was encoded directly from that same PNG in our existing browser resizer, using Original dimensions, Fit, a white background and Chrome 156.0.8078.74. Quality values depend on the encoder; 0.92 does not mean 92% of image quality is retained. This one-card result does not establish a setting for every image, YouTube’s later processing or click-through rate.
Limits that depend on who is uploading
- Verified accounts only: “Your account must be verified to use this feature” for custom thumbnails (YouTube Help, “Add custom thumbnails on YouTube”, read 2026-10-24 03:03 UTC).
- Uploading from a phone: 2 MB for video thumbnails or 10 MB for podcasts (YouTube Help, “Add custom thumbnails on YouTube”, read 2026-10-24 03:03 UTC).
- Uploading from a computer: 50 MB for video, Shorts and podcast thumbnails (YouTube Help, “Add custom thumbnails on YouTube”, read 2026-10-24 03:03 UTC).
- Shorts: 2160 × 3840 recommended, minimum height 640 pixels, 9:16; custom Shorts thumbnails can currently be added only in YouTube Studio on a computer (YouTube Help, “Add custom thumbnails on YouTube”, read 2026-10-24 03:03 UTC).
- Podcast playlists: 1:1 instead of 16:9 (YouTube Help, “Add custom thumbnails on YouTube”, read 2026-10-24 03:03 UTC).
- Vertical videos with a 16:9 thumbnail: replaced by an auto-generated 4:5 thumbnail on the home, explore and subscription pages (YouTube Help, “Add custom thumbnails on YouTube”, read 2026-10-24 03:03 UTC).
- Daily limit: a channel can upload only so many custom thumbnails per day; after “Daily custom thumbnail limit reached”, try again in 24 hours. The limit may vary by country/region or channel history; YouTube Help does not publish the number (YouTube Help, “Add custom thumbnails on YouTube”, read 2026-10-24 03:03 UTC).
Add a custom video thumbnail: the official steps
These steps are from YouTube Help for a computer (YouTube Help, “Add custom thumbnails on YouTube”, read 2026-10-24 03:03 UTC).
- Sign in to YouTube Studio.
- From the left menu, select Content.
- Go to the video you’d like to edit and click it.
- Below “Thumbnail”, click Upload file and choose an image on your device.
- Click Save. Changes may take time to appear on YouTube.
One table. Different upload rules.
Dated comparison: YouTube Help lists 3840 × 2160 (YouTube Help, “Add custom thumbnails on YouTube”, read 2026-10-24 03:03 UTC); the largest public image we could retrieve for 12 videos on October 21, 2026 (UTC) was 1280 × 720 across 72 requests; and two of the top three Google results we read on October 24, 2026 (UTC) still call 1280 × 720 the recommended size.
Recommended upload is 3840 × 2160 — see how much of it you can actually get back. Download the specifications CSV.
The original rows in the comparison below record YouTube thumbnail guidelines from the cited official guidance as checked on . This is a dated comparison across placements and devices, not a historical before-and-after claim. “Not stated” means the linked guidance does not publish that specification. The table shows the YouTube video thumbnail size by upload device. When choosing a size for YouTube thumbnail artwork, use the dimensions column to check width and height and compare the resolution values before exporting. The yt thumbnail size entries distinguish pixel dimensions from file size limits.
The right thumbnail size for YouTube depends on the surface and upload device. YouTube thumbnail dimensions describe pixels; file size limits describe encoded bytes.
| Placement / upload device | Dimensions | Aspect ratio | File size limit |
|---|---|---|---|
| Video thumbnail / desktop upload Source | 3840 x 2160 pixels recommended; minimum width 640 pixels. | 16:9 | Under 50 MB |
| Video thumbnail / mobile upload Source | 3840 x 2160 pixels recommended; minimum width 640 pixels. | 16:9 | Under 2 MB |
| Shorts custom thumbnail / desktop upload Source | 2160 x 3840 pixels recommended; minimum height 640 pixels. | 9:16 | Under 50 MB |
| Shorts custom thumbnail / mobile upload Source | Not available: custom Shorts thumbnails can only be added in YouTube Studio on a computer. | Not stated by YouTube in the cited guidance. | Not stated by YouTube in the cited guidance. |
| Podcast playlist thumbnail Source | Not stated by YouTube in the cited guidance. | 1:1 | Mobile: under 10 MB; desktop: under 50 MB. |
| Channel banner Source | Recommended: 2560 x 1440 px (especially for TV). Minimum upload: 2048 x 1152 px. Text/logo safe area at that minimum: 1235 x 338 px. | 16:9 | 6 MB or smaller |
| Channel profile picture Source | Renders at 98 X 98 px. Upload pixel dimensions: not stated by YouTube in the cited guidance. | Upload ratio: not stated by YouTube in the cited guidance. | Should not exceed 15 MB |
| YouTube community post image size YouTube Help · Checked (UTC) | Pixel dimensions not stated by YouTube in the cited guidance. | 1:1 suggested | Up to 16 MB per image |
| YouTube podcast thumbnail size / show cover YouTube Help · Checked (UTC) | 1280 x 1280 pixels recommended for the square show thumbnail, not an episode video thumbnail. | 1:1 | See the podcast playlist thumbnail row above. |
The YouTube community post size row covers image attachments, not text, polls or video posts. These two supplementary rows were checked on October 14, 2026 (UTC); the CSV retains the September 16 specifications.
Download the September 16 specifications as CSV · UTF-8 · includes source URLs and the check date.
Read the limits in context
Custom thumbnails: YouTube thumbnail requirements include a verified account. Its current Shorts instructions allow custom image uploads in YouTube Studio on a computer, not mobile. The image-format examples listed for thumbnails are JPG and PNG. Official thumbnail guidance.
Shorts on a computer: in YouTube Studio, open Content → Shorts, select the video, then use Thumbnail → Upload file → Save to upload a separate 9:16 image. This is different from choosing a frame from the video. Desktop upload instructions.
Shorts on a phone: YouTube's mobile instructions let you choose a video frame before or after uploading, in the YouTube app. For an existing Short, open Your videos → More → Edit, choose the thumbnail frame, and confirm. This frame picker is in the YouTube app, rather than Studio; it does not upload a separate image. Mobile frame-selection instructions. These two workflows were checked against YouTube Help on October 4, 2026; they have not been tested on a real phone here.
Vertical video previews: the same guidance says a 16:9 custom thumbnail is replaced by an auto-generated 4:5 thumbnail on home, explore and subscription pages; the custom image remains on the watch feed, watch history and non-mobile platforms. This is a display rule, not another image-upload size.
Banners: the branding page distinguishes the minimum upload size from the recommended size. Its companion tips page separately says “at least 2560x1440 px” for best display on all devices. Both statements are retained here: branding specifications and banner tips. Keep the safe-area dimensions tied to the minimum-size canvas; do not treat them as dimensions for every canvas.
Profile pictures: 98 X 98 px describes rendering, not a published upload-resolution recommendation. The branding page lists JPG, GIF, BMP and PNG, excludes animated GIFs, and states the file limit. The tips page recommends a square or round image without specifying a numeric upload ratio. Profile picture guidelines · Profile picture tips.
Other official statements in this section were checked on September 16, 2026. Where the sources use different wording, it is shown separately rather than converted into a new requirement.
A saved Shorts image and a channel card are separate checks
In our October 6, 2026 desktop test, Studio showed a newly saved Shorts image while two later channel cards still showed the old one. The 1080 × 1920 cover also appeared cropped to about 2:3 on the desktop card. The full test, input images and downloadable data are in our Shorts dimensions guide.
See what a different ratio changes
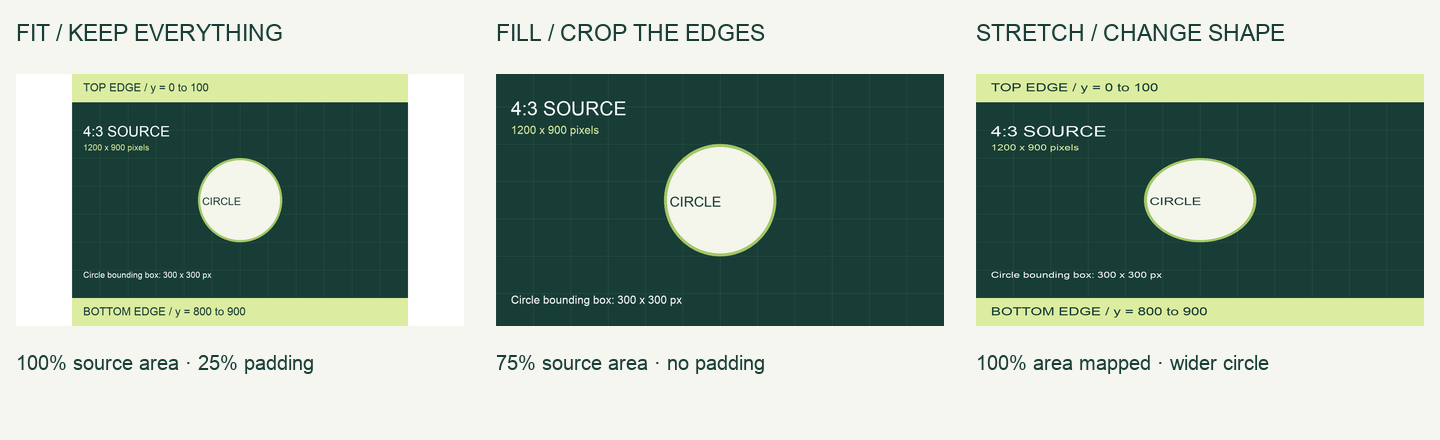
A 4:3 source can fit, crop or stretch into a 16:9 frame. A YouTube thumbnail border drawn into the image follows that same operation. The experiment below shows the same original image all three ways, with exact source coordinates and downloadable results. Our thumbnail ideas study measured the bottom-right duration label, a YouTube thumbnail overlay, at different sizes and positions in the same session. Those observations do not define a universal YouTube thumbnail safe zone.
YouTube thumbnail safe area
A universal YouTube thumbnail safe area is not established by those duration-label observations. Compare important content across the layout previews; a preview remains a simulation.
Our 4:3-to-16:9 experiment
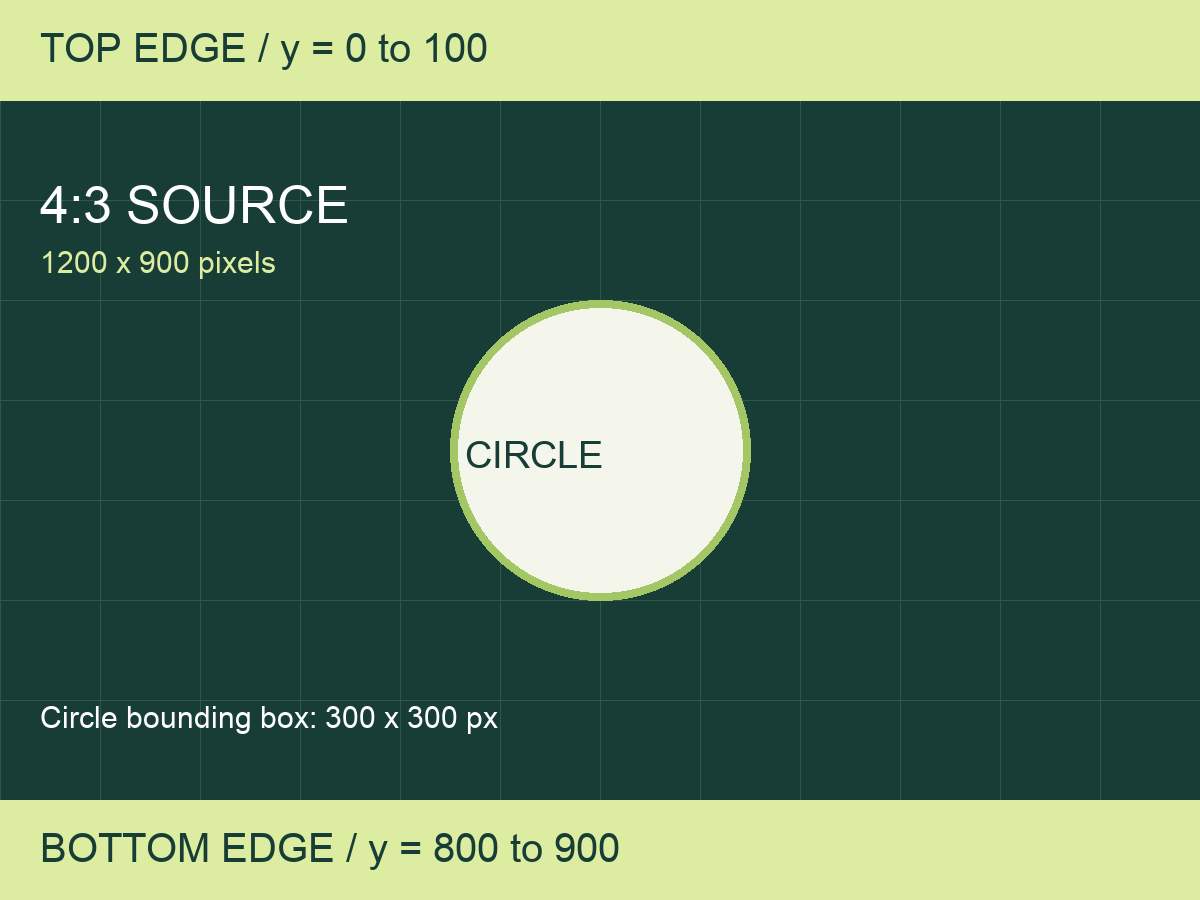
We made one original 1200 × 900 PNG with a coordinate grid, a central circle and labeled bands along its top and bottom. The bands reveal what a crop removes; the circle reveals distortion. We then placed the same source into a 1280 × 720 frame three ways. None of these images is a screenshot of YouTube.
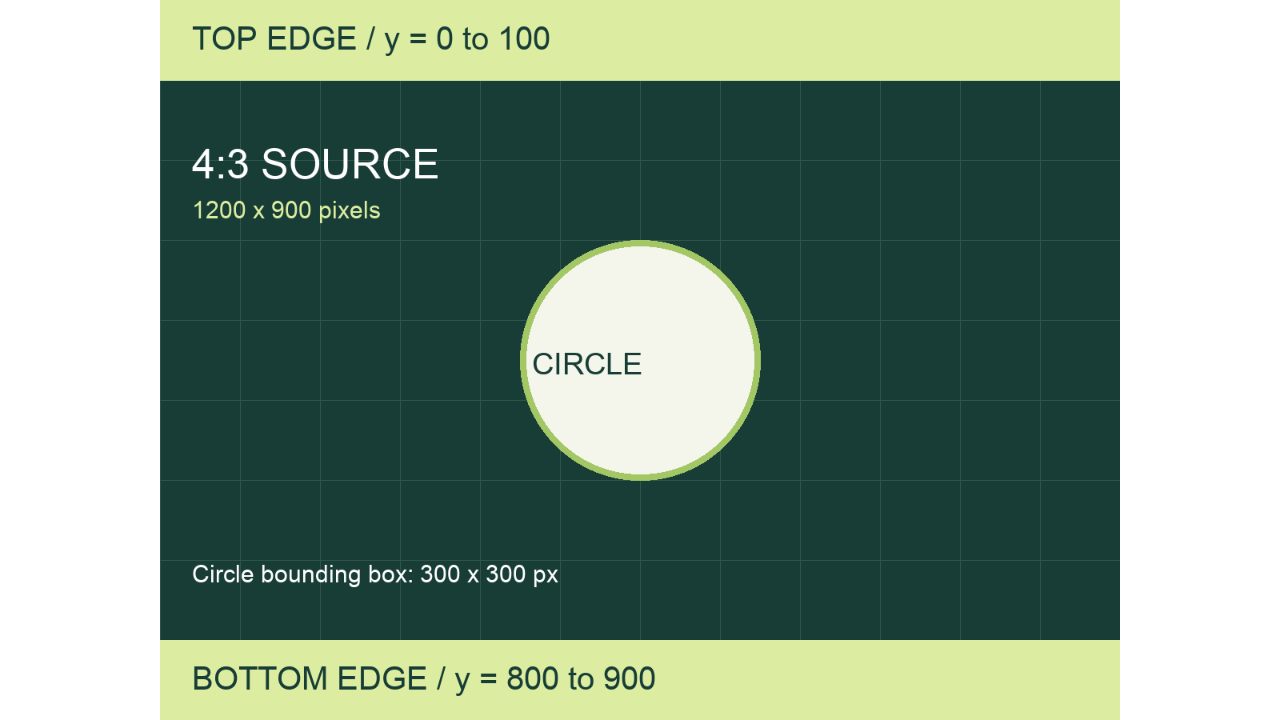
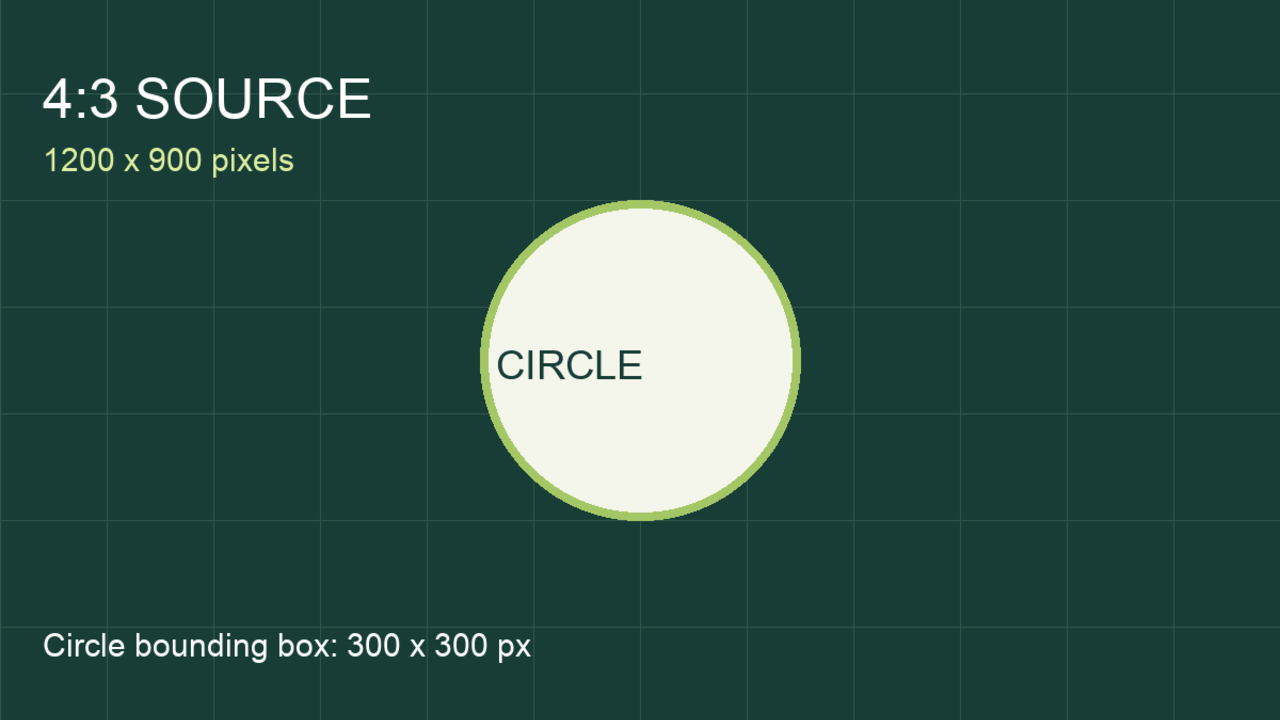
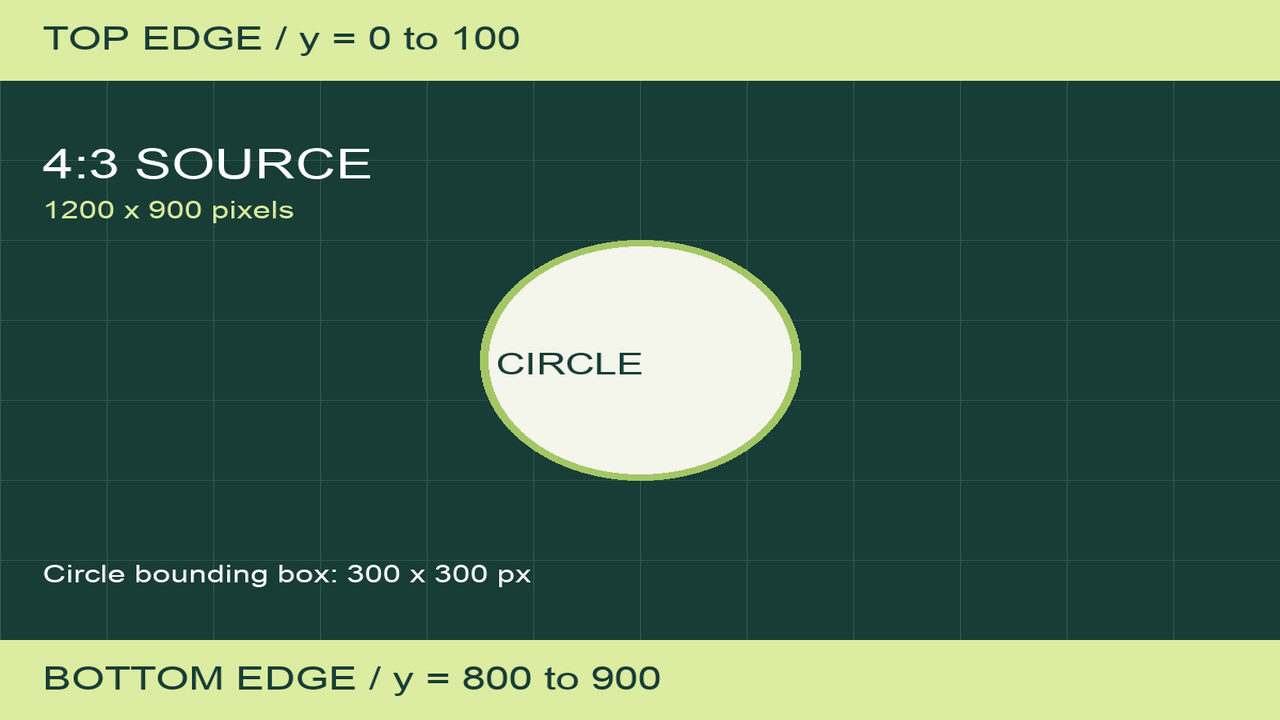
Open the original comparison panel. One source, one output frame; these are controlled examples, not YouTube screenshots.
| Method | Source area mapped | Empty frame area | Circle bounds after mapping |
|---|---|---|---|
| Fit | 100% | 25% | 240 × 240 px |
| Centered Fill | 75% | 0% | 320 × 320 px |
| Stretch control | 100% | 0% | 320 × 240 px |
“Source area mapped” is a geometric coverage measure, not a claim that every original pixel remains unchanged. All three transformations resample the image. Circle bounds are calculated from the source's 300 × 300 coordinate box; anti-aliased edge pixels are not counted as a separate measurement.
A ratio describes shape, not sharpness
A 16:9 YouTube thumbnail ratio means 16 units of width for every 9 units of height. A 1280 × 720 image, a 1920 × 1080 image and a 3840 × 2160 image all have that shape. They do not contain the same amount of detail. Changing a file's aspect ratio and changing its encoded file size are also different operations.
Fit: preserve the picture, leave room around it
The source is relatively taller than the destination. To fit the whole image, scale it by the smaller of the width and height ratios: min(1280 ÷ 1200, 720 ÷ 900) = 0.8. This produces an image rectangle of 960 × 720 pixels. Centering it leaves (1280 − 960) ÷ 2 = 160 pixels of padding on each side.
Destination image rectangle: x = 160, y = 0, width = 960, height = 720
Padding area: 2 × 160 × 720 ÷ (1280 × 720) = 25%
The top and bottom labels survive, and the circle stays circular. The tradeoff is that the image uses only three quarters of the frame area. The padding is part of this exported thumbnail file. It is not a prediction that YouTube will add its own bars.
Check black bars in the file
If you see YouTube thumbnail black bars, check whether they are already part of the image file. The padding in our Fit example is exported with the image; it does not predict bars added by YouTube.
Fill: use the whole frame, give up some edges
To cover the destination, use the larger scale: max(1280 ÷ 1200, 720 ÷ 900) = 16/15. The scaled image is 1280 × 960. A centered 720-pixel-high frame therefore cuts off 120 scaled pixels above and another 120 below.
Convert that crop back into source coordinates by dividing by 16/15. Each removed strip is 112.5 source units high. The retained source rectangle runs from y = 112.5 to y = 787.5, with its full 1200-pixel width. Its height is 675, so it contains 675 ÷ 900 = 75% of the original source area.
Source rectangle: x = 0, y = 112.5, width = 1200, height = 675
Destination rectangle: x = 0, y = 0, width = 1280, height = 720
The circle keeps its shape, but both labeled edge bands disappear. This makes “check the crop” concrete: content above y = 112.5 or below y = 787.5 does not survive this centered crop. Repositioning a crop changes which content survives; it does not change the amount of area kept at this fixed source and destination ratio.
Check the cropped edges
To avoid a YouTube thumbnail cut off at the top or bottom during export, inspect the Fill crop before saving. Reposition it if important content falls outside the retained rectangle.
Stretch: no missing edges, but a different shape
The stretch control maps the full source directly to the destination. Horizontal scale is 1280 ÷ 1200 = 16/15; vertical scale is 720 ÷ 900 = 0.8. Their ratio is 4/3. Objects become one third wider relative to their height, so our circle's 300 × 300 coordinate box becomes 320 × 240.
All the bands remain visible and no padding is needed. Neither fact means the result preserves the design. Faces, product shapes, circles and lettering can all look wrong when the two axes use different scale factors. This control is included to explain the failure mode; ThumbGlance's resizer offers Fit and Fill rather than a Stretch option.
What we measured, and how to repeat it
The Fit and Fill PNGs were encoded by our current resizer in a Chrome 153 browser on macOS on September 23, 2026. A local test harness loaded the original source, selected PNG, kept the 1280 × 720 output and recorded the Canvas drawImage arguments. The recorded Fit destination was [160, 0, 960, 720]; Fill used source [0, 112.5, 1200, 675] and destination [0, 0, 1280, 720]. These recorded values match the calculations above.
The Stretch control was generated separately with Pillow's Lanczos resize. It is not a hidden resizer feature or a YouTube test. The comparison panel scales the three results for reading on this page; download the individual PNGs to inspect the full output. Resampling filters and browser versions can change edge pixels without changing the geometric rectangles.
Download the geometry table and SHA-256 file hashes · Read the browser experiment record
- Download the original 1200 × 900 sample and open the resizer.
- Select 1280 × 720, Fit and PNG. Check for the two side bars and both edge labels.
- Switch only Image placement to Fill. The edge labels should disappear while the circle stays round.
- Try your own image and inspect the subject and text before exporting. A numerical area percentage cannot tell you whether the lost part matters.
This is a controlled geometry example, not a ranking experiment, readability score or universal safe area. It does not establish how every YouTube surface crops an image. For vertical videos, the official help page describes a separate 4:5 auto-generated-thumbnail rule on selected surfaces; that is not the same operation as our centered Fill example.
Watch the comparison
A short walkthrough of our original examples, with a synthetic English voice and English captions. The figures are controlled tests, not YouTube screenshots.
Compare the same detail
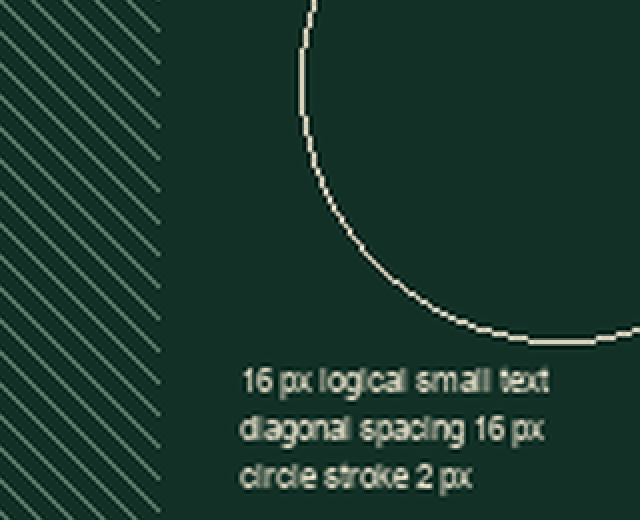
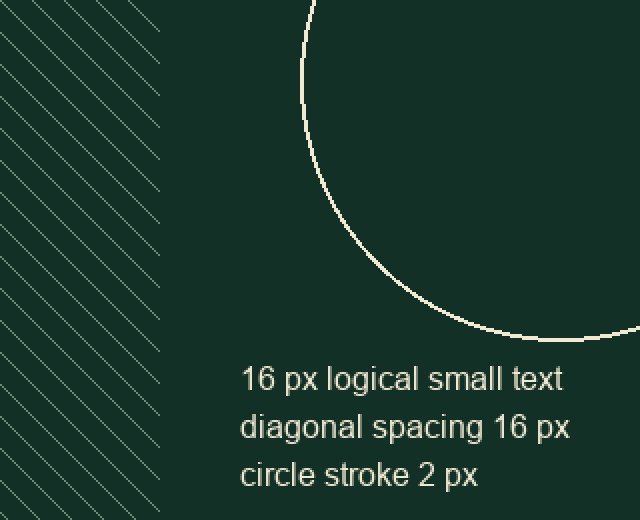
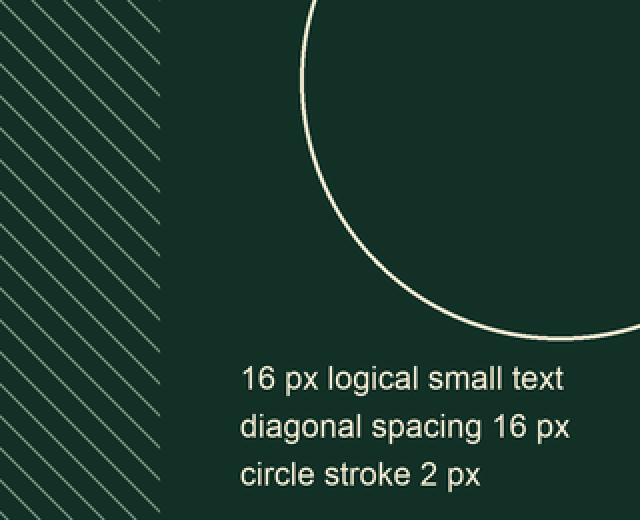
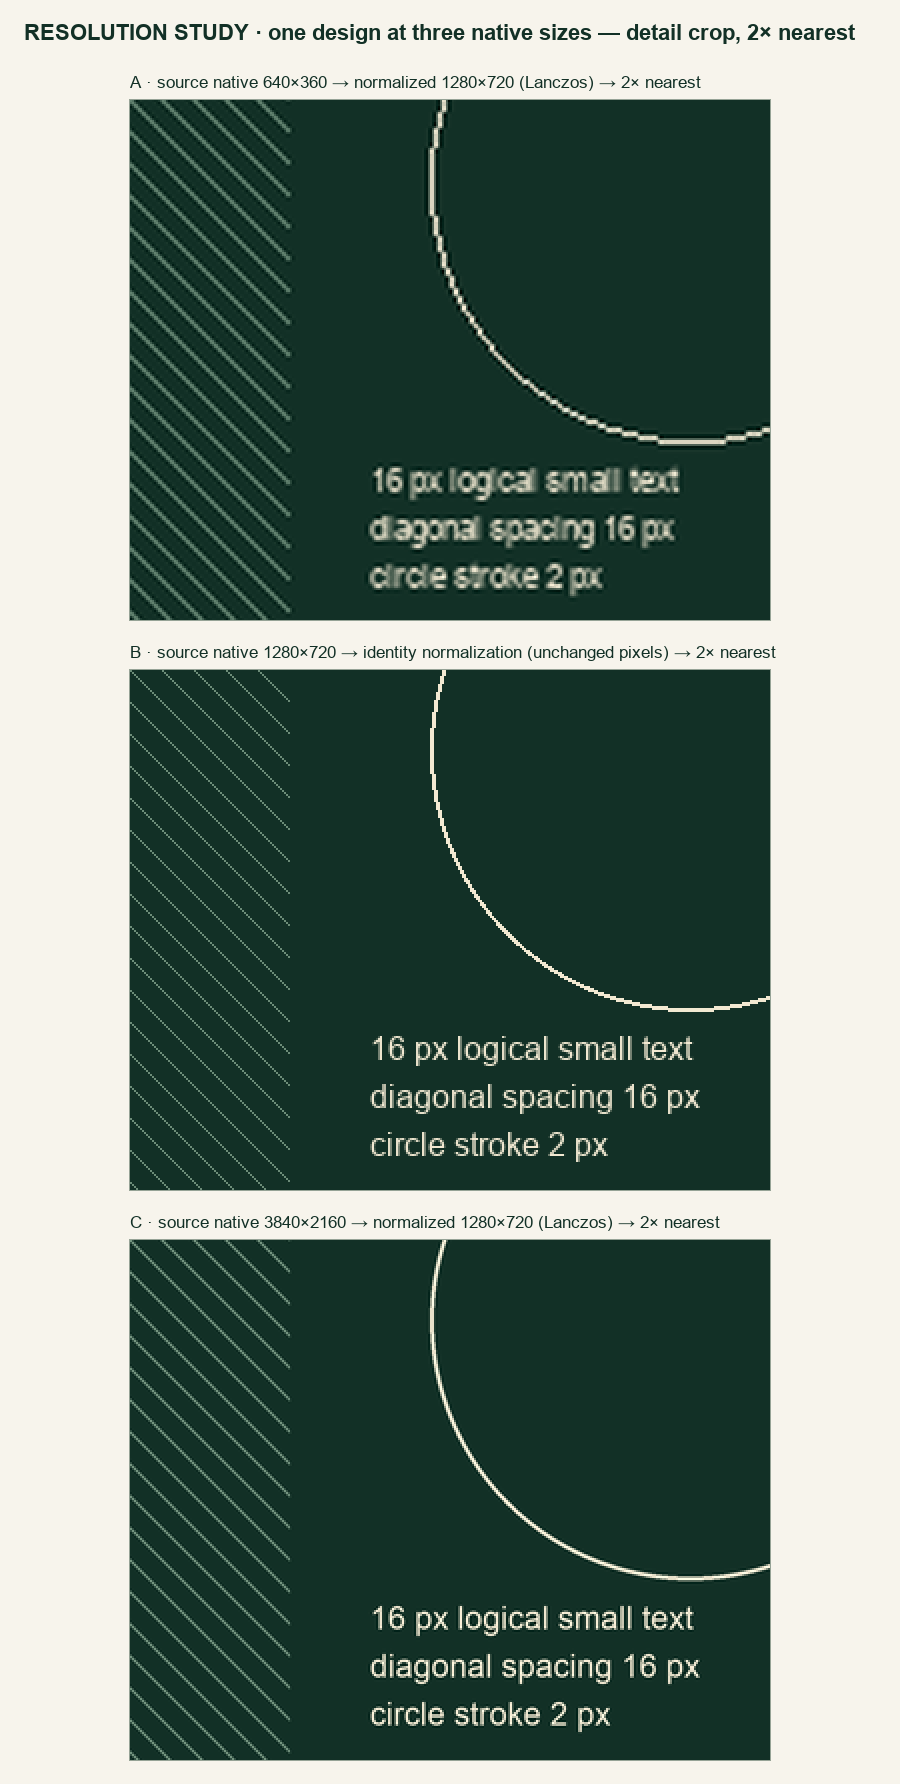
Open the original labeled comparison panel. All crops show the same rectangle at the same scale. These are local outputs, not YouTube processing.
How to read the crops and their limits
The detail panel takes the same coordinate rectangle from each normalized output. Each crop is enlarged twice with nearest-neighbor sampling so its existing pixels remain inspectable rather than being smoothed again. The labels describe source resolution, not a score. Compare the small lettering, the diagonal edge and the curve at the same on-screen scale. Open the full-size panel before judging tiny differences on a phone.
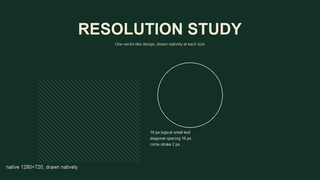
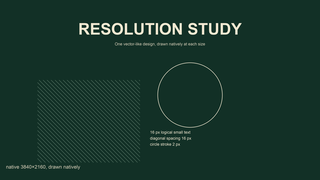
The crop runs from (480, 340) to (800, 600) on each 1280 × 720 output: 320 × 260 pixels, enlarged to 640 × 520. In the inspected panel, the enlarged 640 source has coarser circular steps and softer, heavier small lettering than the unchanged 1280 control. The 3840 source reduced to 1280 gives the curve a smoother edge. These are observations of this particular drawing, not a numerical quality ranking.
Check quality at a small display size
If you find your YouTube thumbnail blurry, inspect its source detail, exported pixels and small preview. YouTube thumbnail quality cannot be inferred from file dimensions or byte count alone; the observations here apply to this drawing and local pipeline.
Rasterization also rounds coordinates and stroke widths. The one-logical-pixel diagonal line becomes one native pixel at width 640, one at 1280 and three at 3840, because the generator enforces a one-pixel minimum. After enlargement the low-resolution diagonal is therefore proportionally thicker. Do not interpret that line-weight difference as a pure resolution effect. The native-size label changes between images and lies outside the compared crop.
Download the detail panel from the 640 source · from the 1280 control · from the 3840 source
Check all three at a small display size
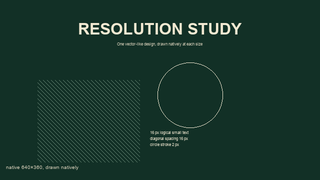
The additional 320 × 180 previews, each resized directly from its native source, are a different check: all three designs have to fit a small display. More source pixels cannot make an overly small label occupy more space in that fixed layout. If a label is difficult to read there, enlarge the label in the design or simplify the composition. Increasing export dimensions alone leaves its proportion of the frame unchanged.

One design, three native resolutions
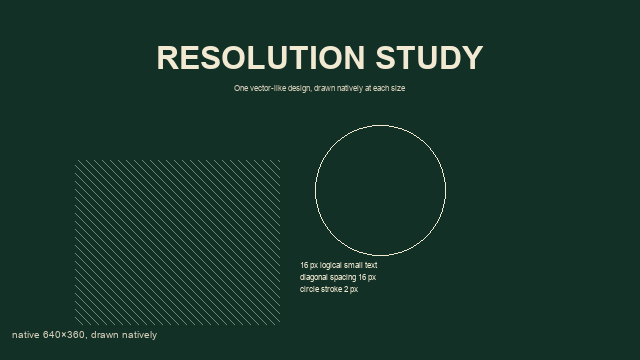
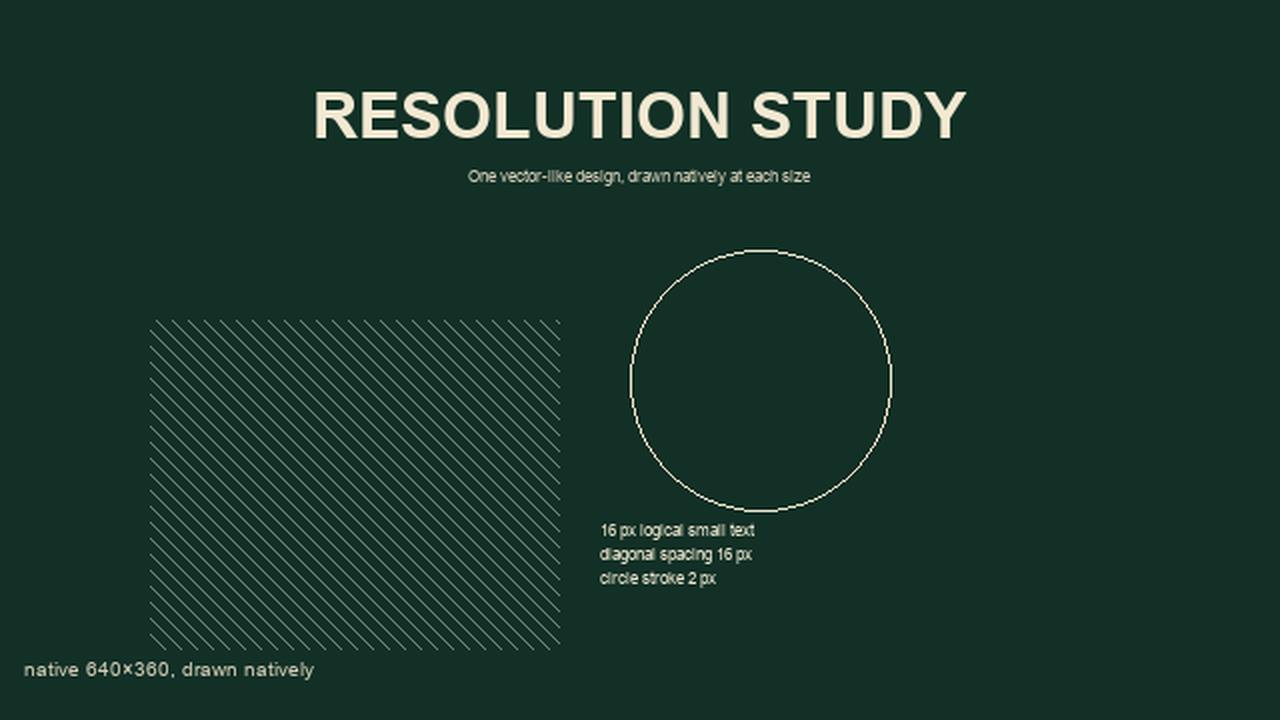
We drew one original design independently at 640 × 360, 1280 × 720 and 3840 × 2160. The layout, colors, text and shape coordinates follow the same proportional design. Each image is a fresh rasterization at its own native size. The small version is not made by reducing the large version, and the large version is not an enlargement of the small one.
We then normalized every source to a 1280 × 720 PNG with the same Lanczos resampling filter. This deliberately holds output dimensions and lossless encoding constant. The 640-pixel-wide source must be enlarged twice along each axis. The 1280-pixel-wide source needs no resize. The 3840-pixel-wide source is reduced to one third of its width and height. These are local Pillow outputs, not files downloaded from YouTube.
HD and 4K: check the pixels
If an export is labelled “YouTube thumbnail HD” or “YouTube thumbnail 4K”, check its actual pixel dimensions. The native sources in this study show why a dimension label alone does not establish recovered detail or sharpness.
Measured native PNG bytes are 12,672 (640 × 360), 32,995 (1280 × 720) and 142,144 (3840 × 2160). Their normalized 1280 × 720 outputs contain 102,070, 32,995 and 84,836 bytes respectively.
| Native source | Native PNG bytes | Normalized 1280 × 720 PNG bytes |
|---|---|---|
| 640 × 360 | 12,672 | 102,070 |
| 1280 × 720 | 32,995 | 32,995 |
| 3840 × 2160 | 142,144 | 84,836 |
Download the three source / output pairs
- 640 × 360: Native PNG · Normalized PNG
- 1280 × 720: Native PNG · Normalized PNG
- 3840 × 2160: Native PNG · Normalized PNG
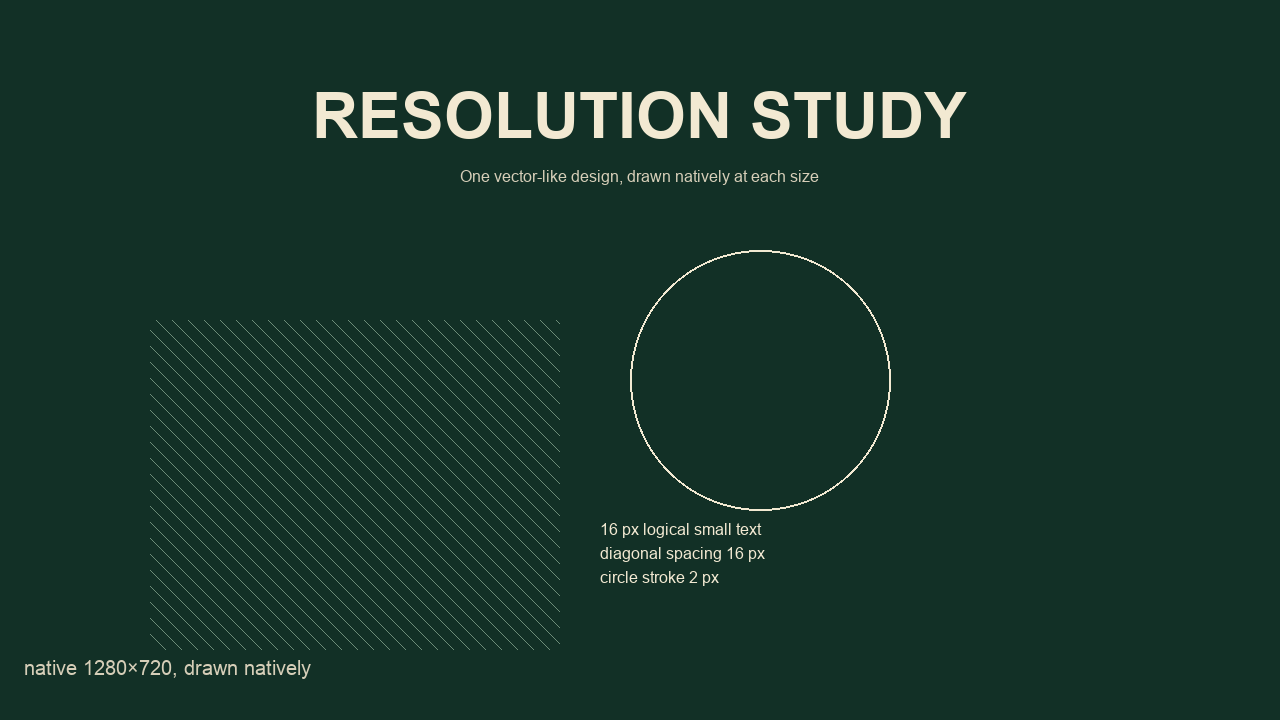
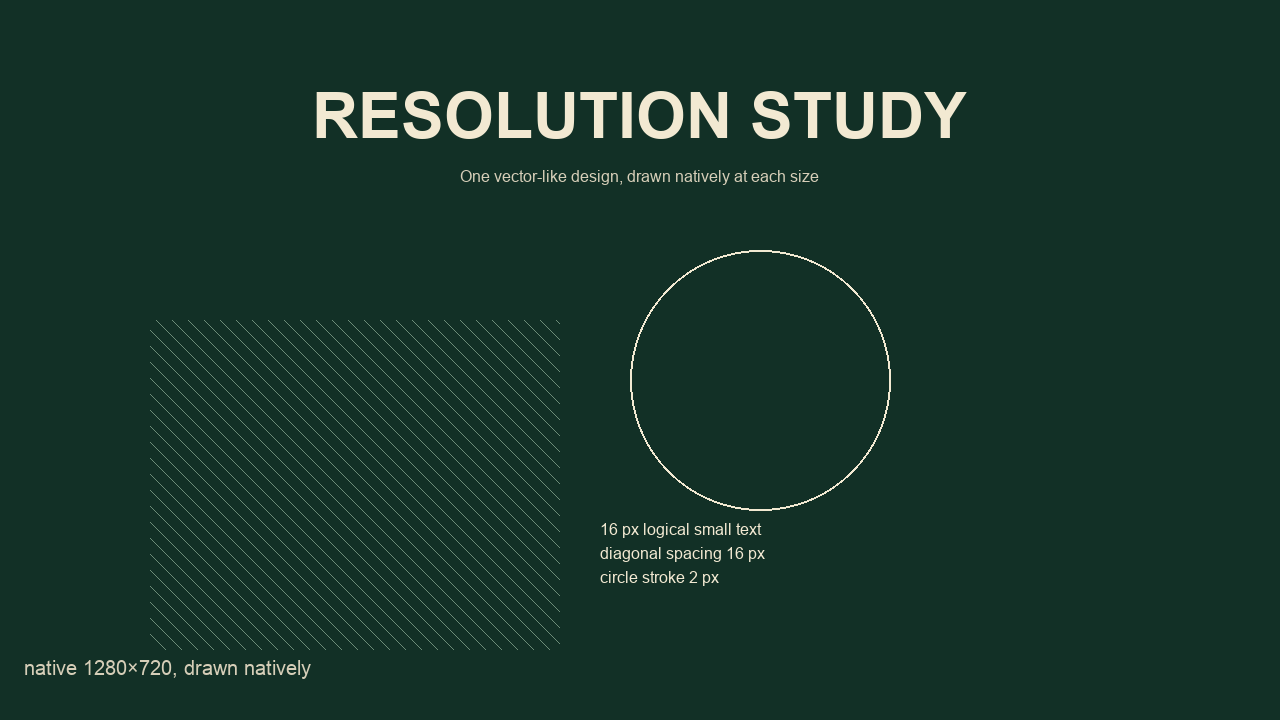
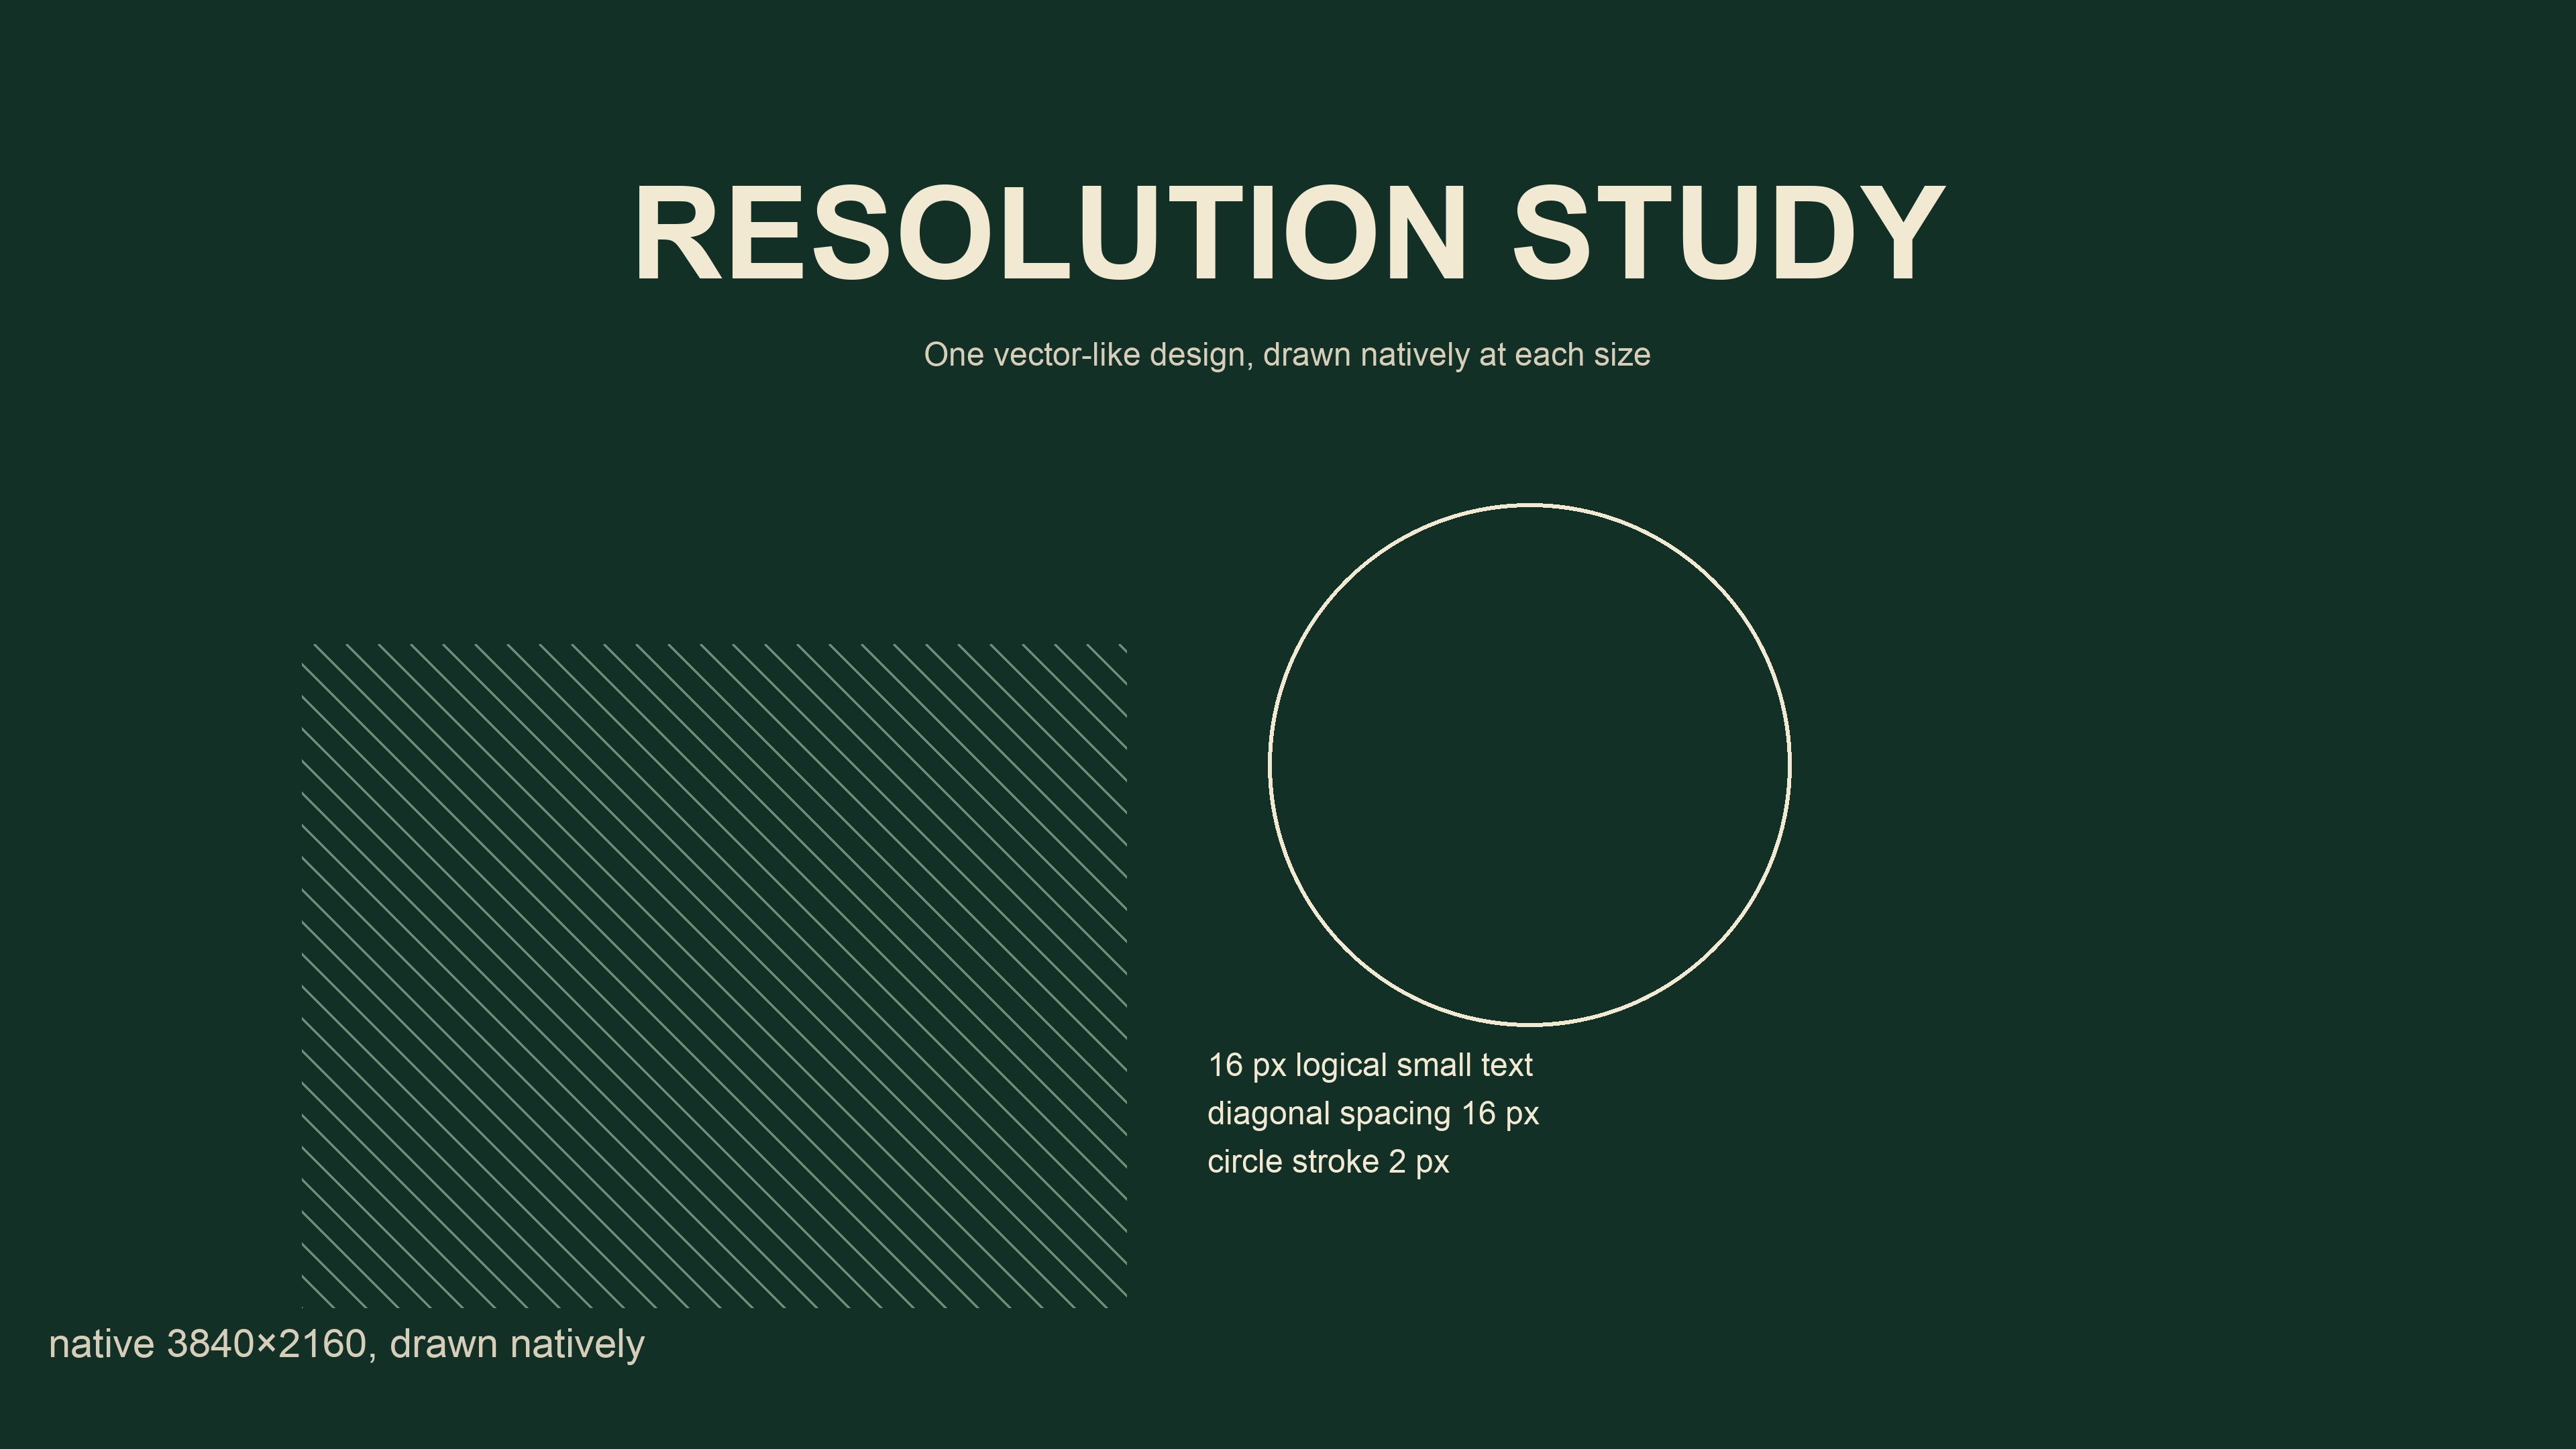
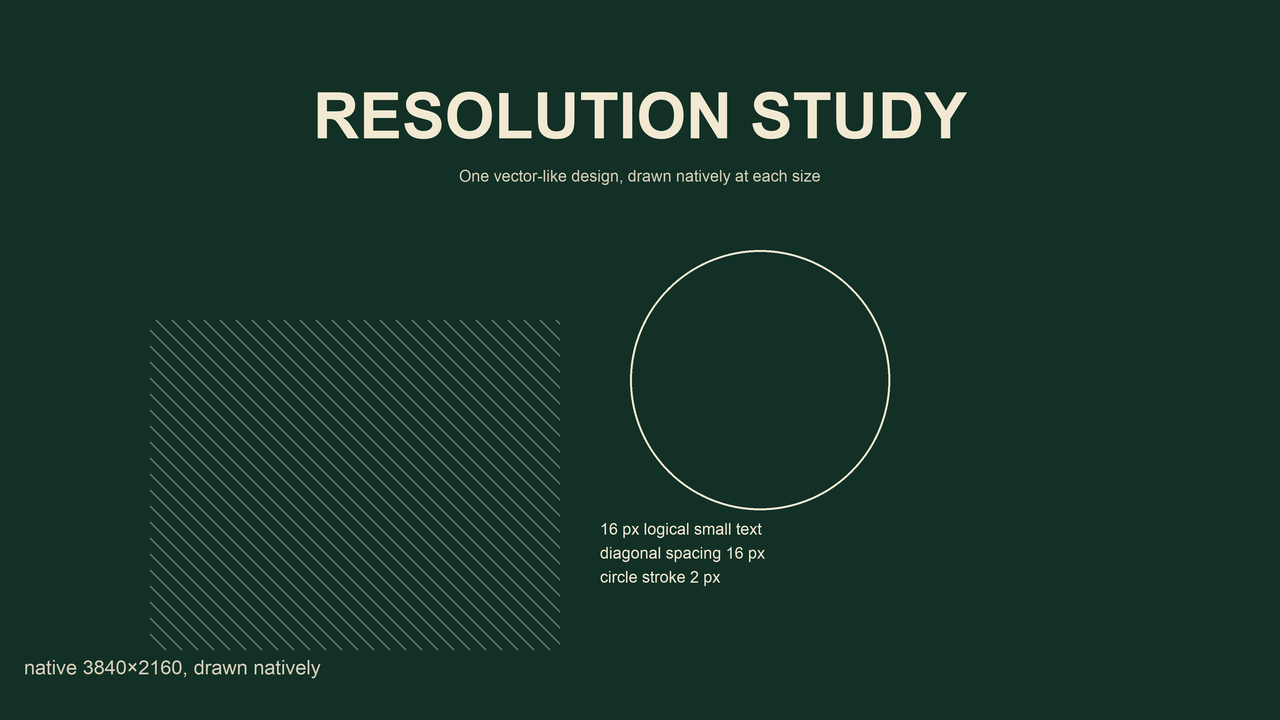
In this example the enlarged low-resolution output is the largest normalized file; byte size is not a sharpness score.
The arithmetic behind the comparison
The native images contain 230,400, 921,600 and 8,294,400 pixels respectively. Doubling both dimensions multiplies the pixel count by four. Tripling both dimensions multiplies it by nine. That is why the 3840 × 2160 source contains nine times as many pixels as the 1280 × 720 source, even though the width is only three times larger.
Our common output contains 921,600 pixels in all three cases. The enlarged 640 × 360 version therefore has four output pixels for every original pixel on average. Interpolation calculates those new values from the existing samples. A larger output file is not evidence that new lettering detail was recovered. Conversely, reducing the largest source combines information from multiple source pixels into each destination pixel. The resulting edge treatment depends on the filter and the original drawing.
What enlargement can do
This page does not include a YouTube thumbnail upscaler. Its enlargement example interpolates existing samples; it is not an AI enhancement test or evidence of recovered source detail.
File bytes answer another question. PNG byte counts depend on image patterns and compression as well as dimensions. We record actual encoded bytes rather than predicting that nine times the pixels means nine times the file size. This experiment keeps PNG encoding throughout so JPEG quality is not an additional variable. Our separate compression study changes that variable deliberately.
Repeat it and understand the limit
Download the native PNGs, the normalized outputs and the JSON results — the experiment table above links each file. The record includes image dimensions, file bytes, hashes, software version, font choice and crop rectangle. The generator redraws the same coordinates at each native scale, resizes to a common canvas and builds the comparison panels. The unchanged 1280 × 720 control must match its normalized version exactly.
Download the JSON results · Download the generator script
To rerun the study you need Python 3 and Pillow. The script expects Arial at the macOS system paths /System/Library/Fonts/Supplemental/Arial.ttf and /System/Library/Fonts/Supplemental/Arial Bold.ttf and exits if either font is missing. All outputs are written to an output/ folder next to the generator. The script uses no clock, randomness or network inputs, but you only get byte-identical results with the same Python, Pillow, FreeType and font versions recorded in the JSON.
This is one synthetic design, one font and one local rasterization pipeline. It isolates a useful source-resolution question; it does not estimate click-through rate, rank designs or reproduce YouTube's processing. Browser zoom, screen pixel density and the viewer's actual display size can change how obvious the differences look. A photograph may behave differently from our text and geometric shapes. Keep the source design and inspect your own output instead of treating this example as a universal sharpness guarantee.
PPI metadata side study: same pixels, different inch sizes
Pixel dimensions alone do not determine inches. Divide pixels by an assumed pixels-per-inch value. Our 1280 × 720 example is 17.78 × 10 inches at 72 PPI, or 4.27 × 2.40 inches at 300 PPI. These are calculated physical-size equivalents, not YouTube requirements or measured screen sizes.
Same pixels, five files
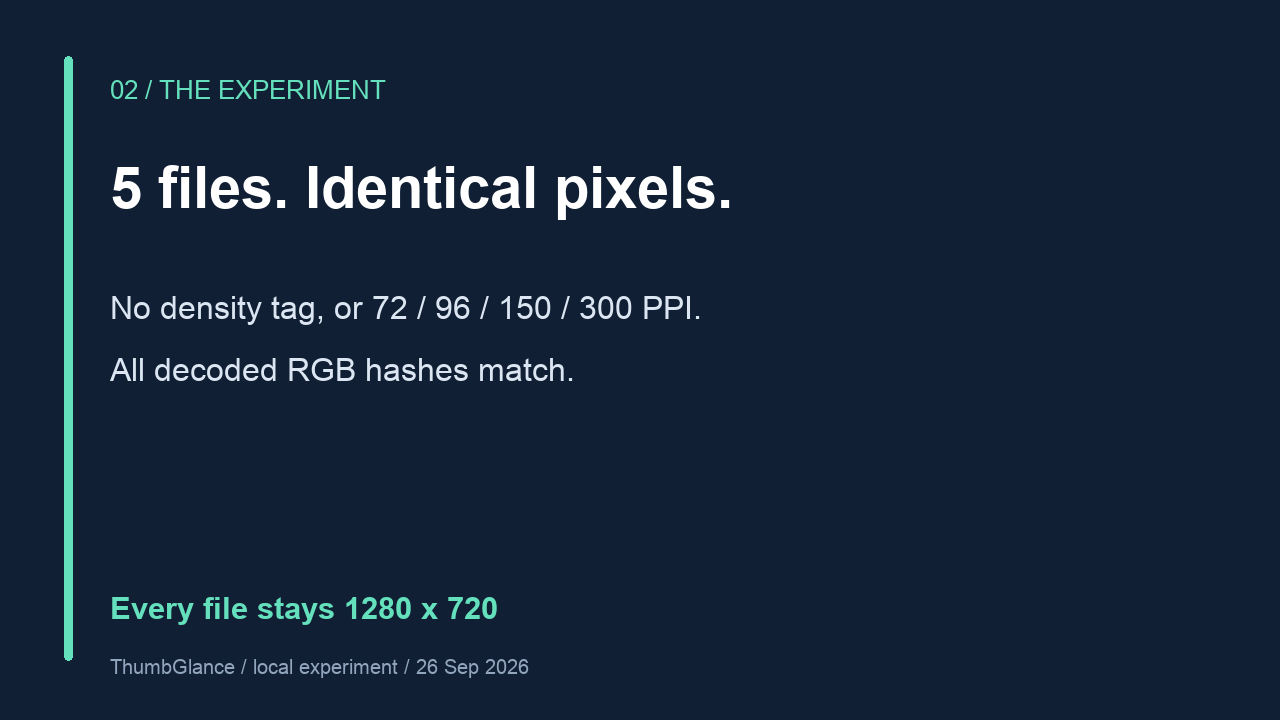
We saved one original RGB illustration as five PNG files: no density tag, then requested densities of 72, 96, 150 and 300 PPI. We did not resize, crop, sharpen or resample it. Reopening every file gave 1280 × 720 pixels and the same SHA-256 hash of decoded RGB bytes. All five pixel arrays are identical; the encoded files differ because their metadata differs.
Calculate the inch size
| Assumed PPI | Width in inches | Height in inches |
|---|---|---|
| 72 | 17.78 | 10.00 |
| 96 | 13.33 | 7.50 |
| 150 | 8.53 | 4.80 |
| 300 | 4.27 | 2.40 |
The formula is inches = pixels / PPI. The table rounds to two decimal places. At 300 PPI, a separate 3840 × 2160 example equals 12.8 × 7.2 inches. None of these assumptions changes the pixel dimensions or proves how YouTube will display an image.
Download our actual PNGs: no density tag · 72 PPI · 96 PPI · 150 PPI · 300 PPI.
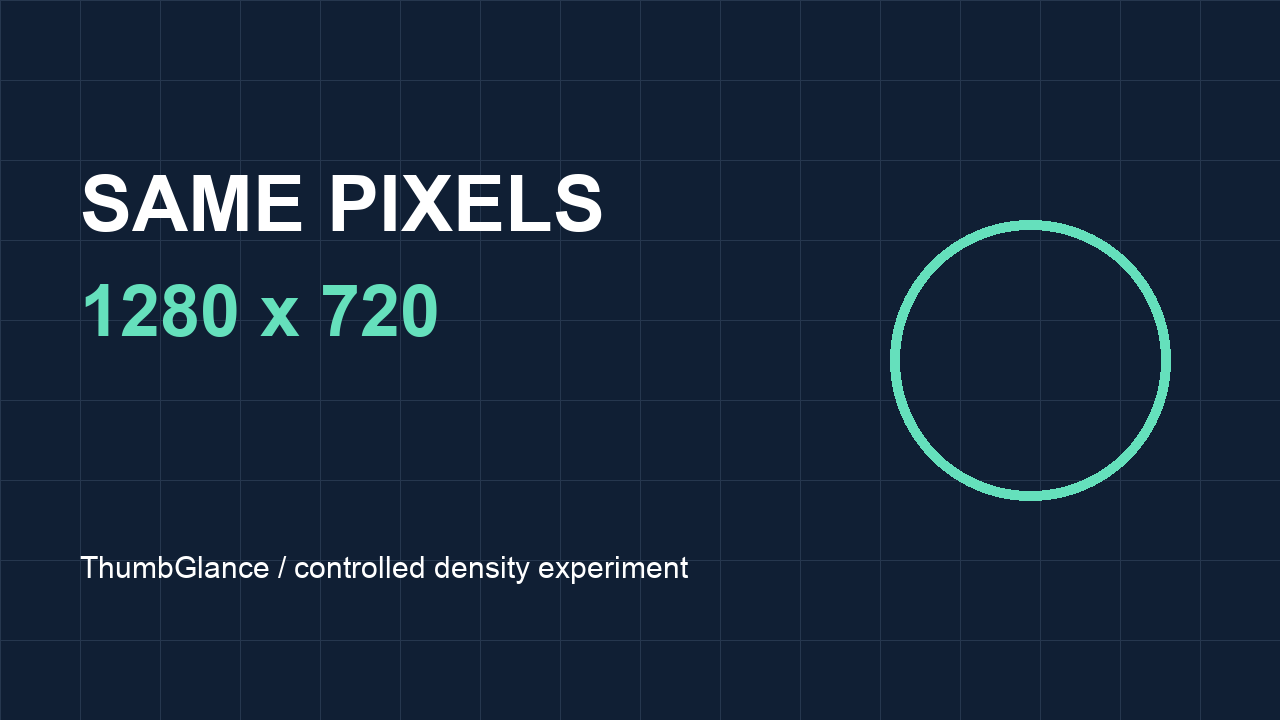
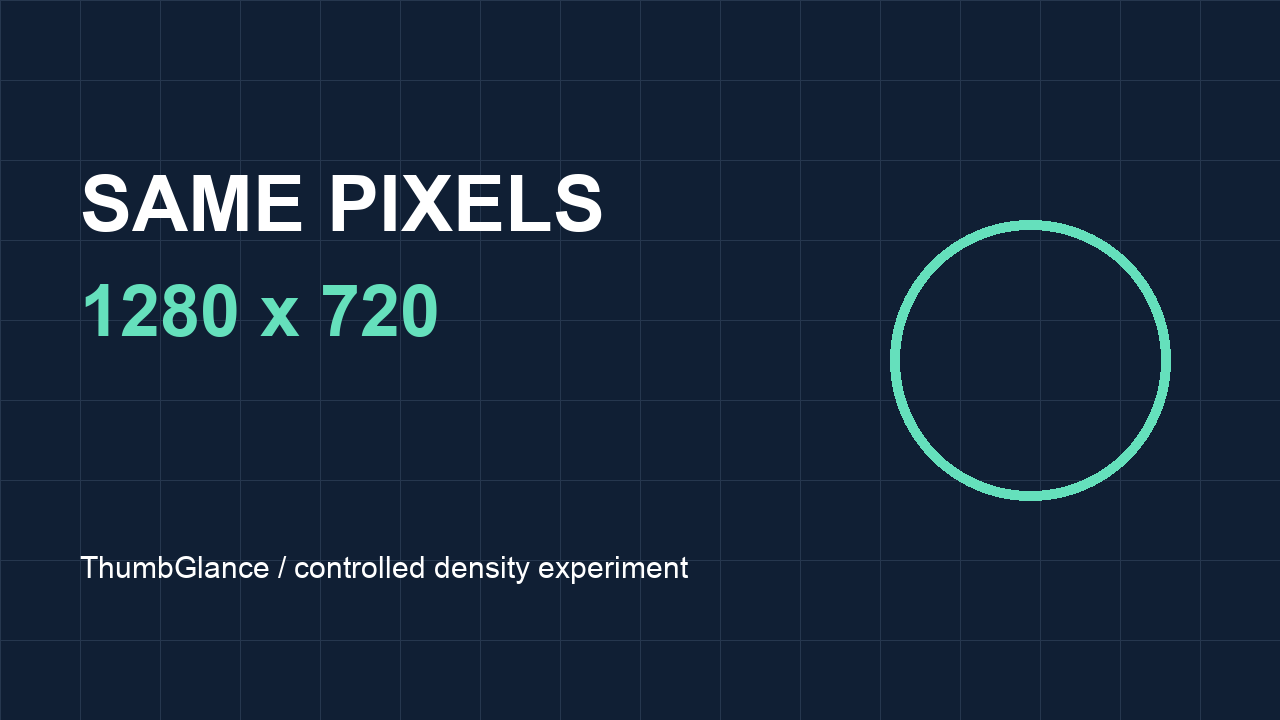
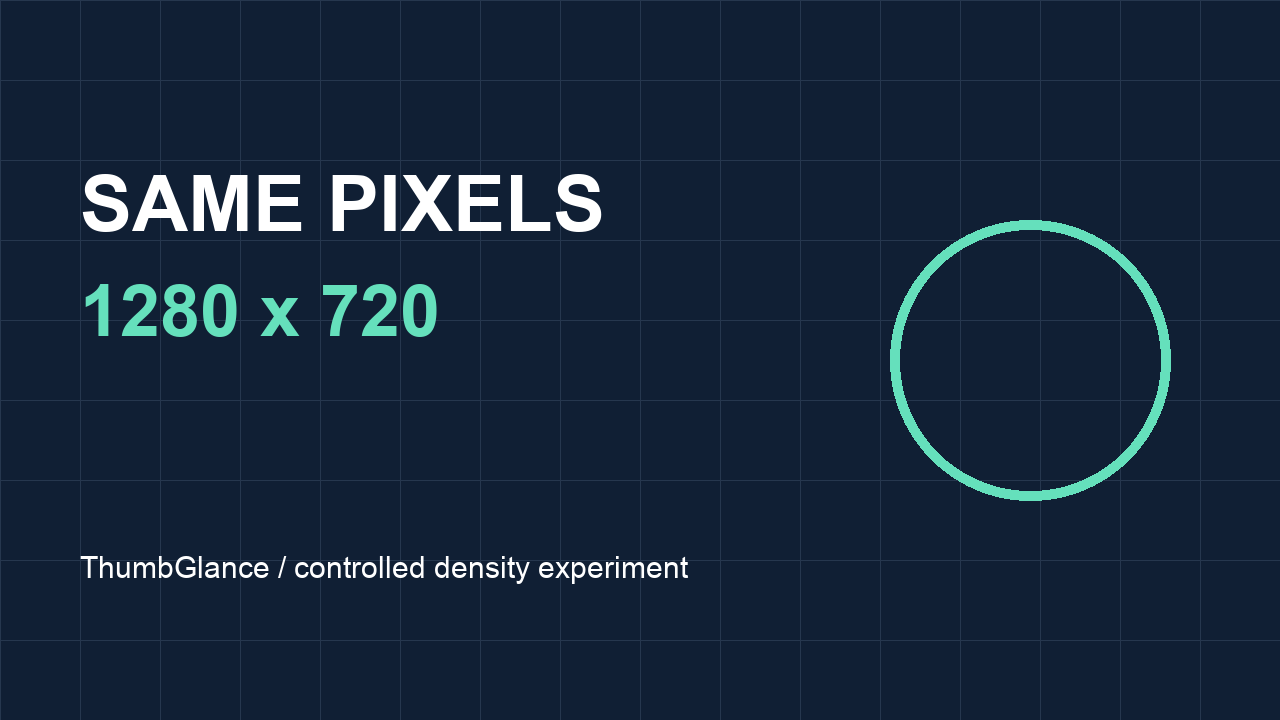
Measured dimensions, stored densities, bytes and pixel hashes · All 12 conversions as CSV. The CSV uses three example pixel sizes and four assumed densities. Inputs are explicit and results are arithmetic, not platform rules.
PNG density is stored in pixels per metre, so a decoder can report a slightly different PPI after unit conversion. Our JSON retains those decoded values. To reproduce this comparison with Python and Pillow, open the no-density sample and save copies using image.save("copy.png", dpi=(72, 72)), changing only the density for each copy. Reopen each output, compare its dimensions and decoded RGB bytes. Encoding versions can affect file bytes, so pixel identity is the relevant check.
Check the exported pixels
For screen use, prefer pixel units. If your editor requires inches, use an explicit density and check the exported pixel dimensions; rounded inch inputs may give a different pixel count. Changing density metadata and resampling are different operations. Adobe explains the distinction between physical size, resolution and resampling.
This side study uses one synthetic image and Pillow PNG exports. It does not test Photoshop export defaults, printers, browser sizing, JPEG encoding or YouTube uploads. We did not upload the samples. A density label alone adds no new pixel detail.
What happens when you change PPI in macOS Preview?
In our Preview test, changing 100 PPI to 300 PPI kept the image at 1280 × 720 pixels with Resample image off, but produced 3840 × 2160 pixels with it on. The setting determines whether Preview preserves the pixel dimensions or the physical size. This is a real editor export test, separate from the five metadata-only Pillow files above.
We created one original white-and-black illustration with a rectangle and “PPI TEST” text in Photopea: 1280 × 720 pixels, 100 PPI. We exported a PNG with its density metadata, then opened that same baseline in macOS Preview 11.0 on macOS 27.0.1. For each branch we made a separate duplicate of the baseline, used Tools → Adjust Size, and changed only Resolution to 300 pixels/inch. Scale proportionally was enabled for the resampled branch. Each duplicate was saved as a PNG and measured again from the exported file.
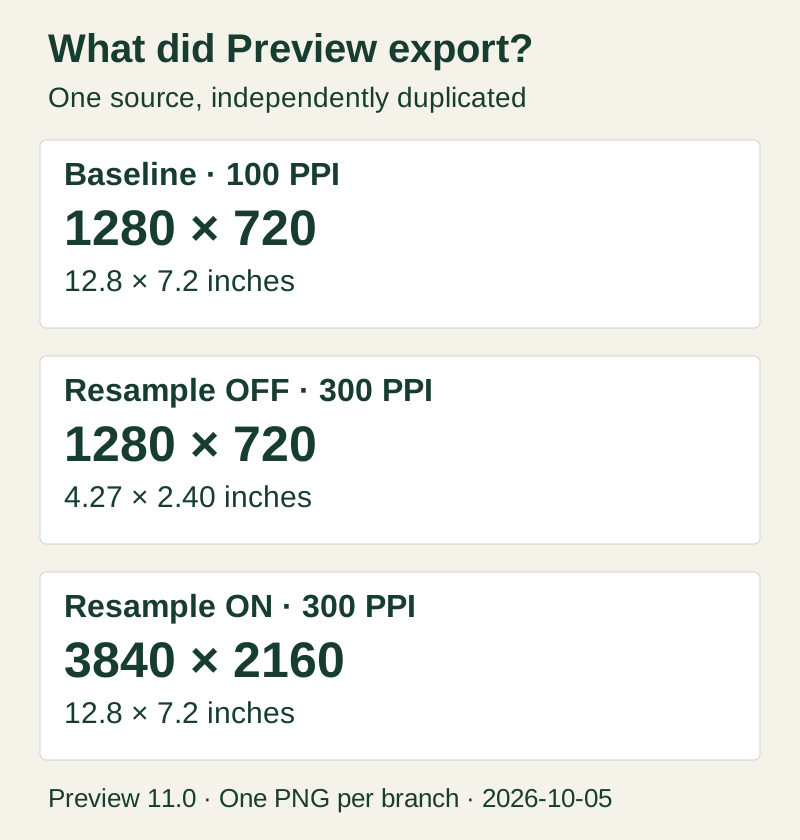
| File / setting | Exported pixels | Preview inches | PNG bytes |
|---|---|---|---|
| Baseline, 100 PPI | 1280 × 720 | 12.8 × 7.2 | 5,668 |
| Resample off, 300 PPI | 1280 × 720 | 4.27 × 2.40 | 23,323 |
| Resample on, 300 PPI | 3840 × 2160 | 12.8 × 7.2 | 175,811 |
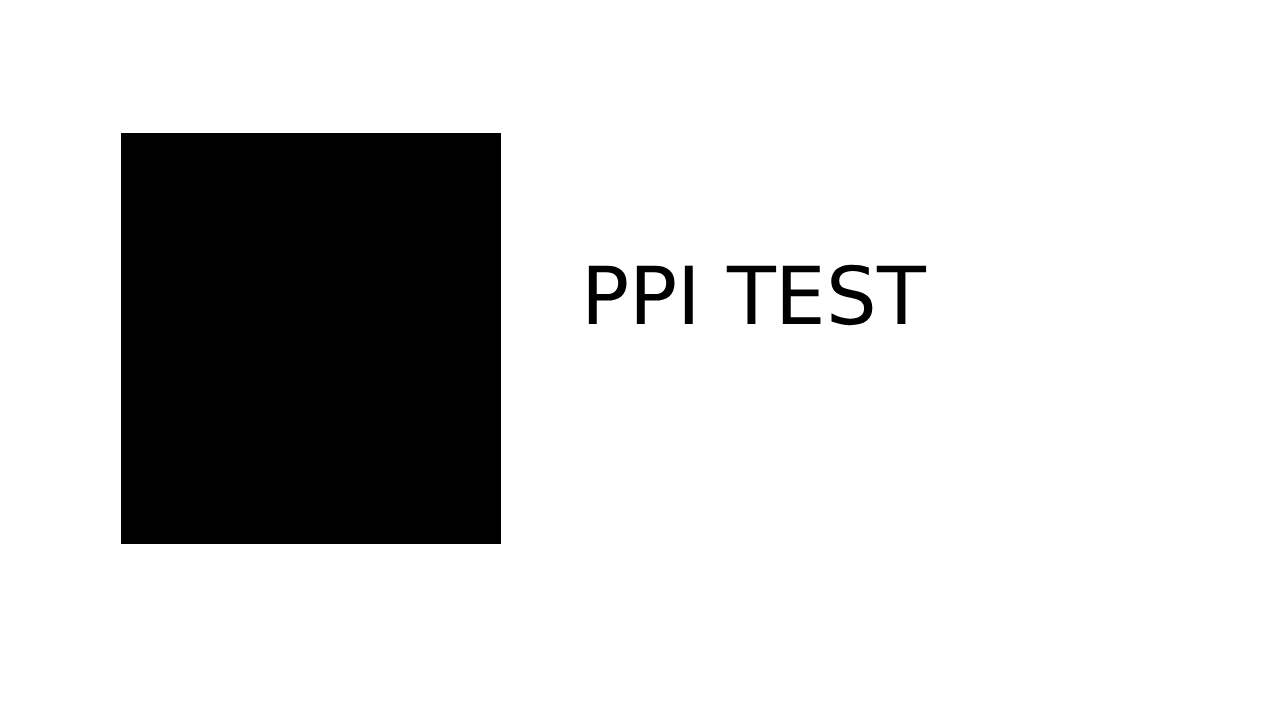
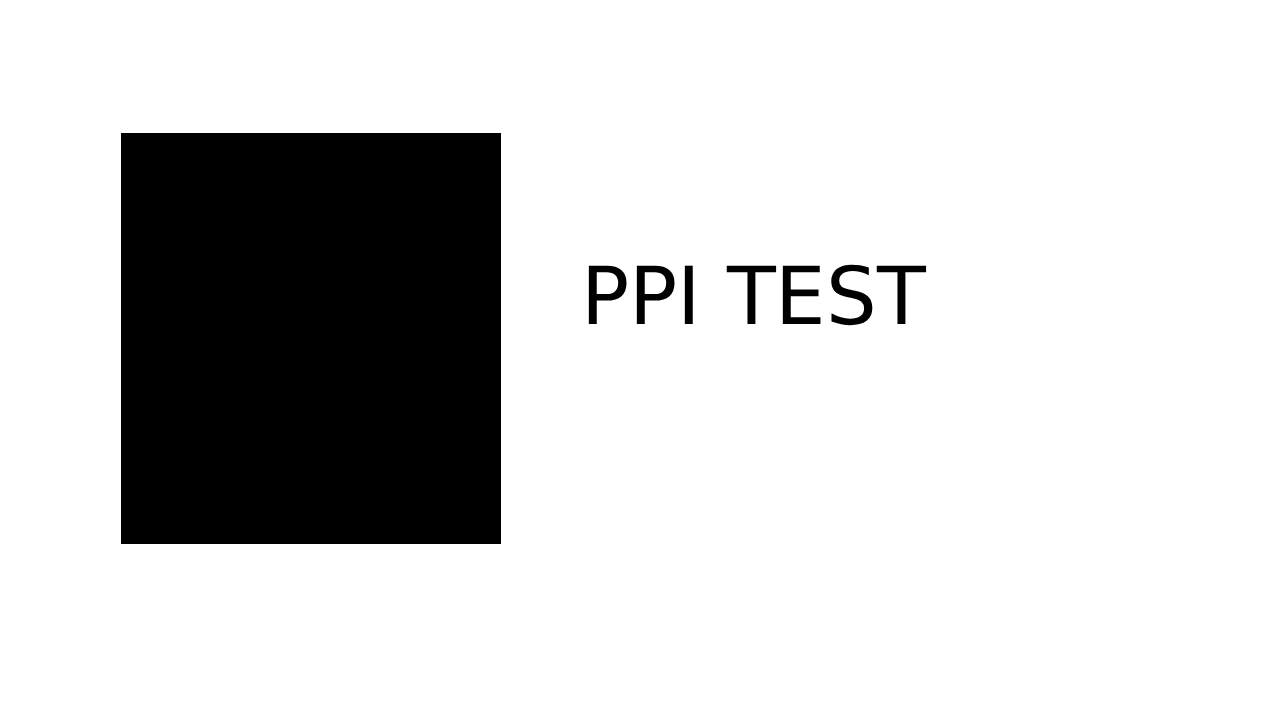
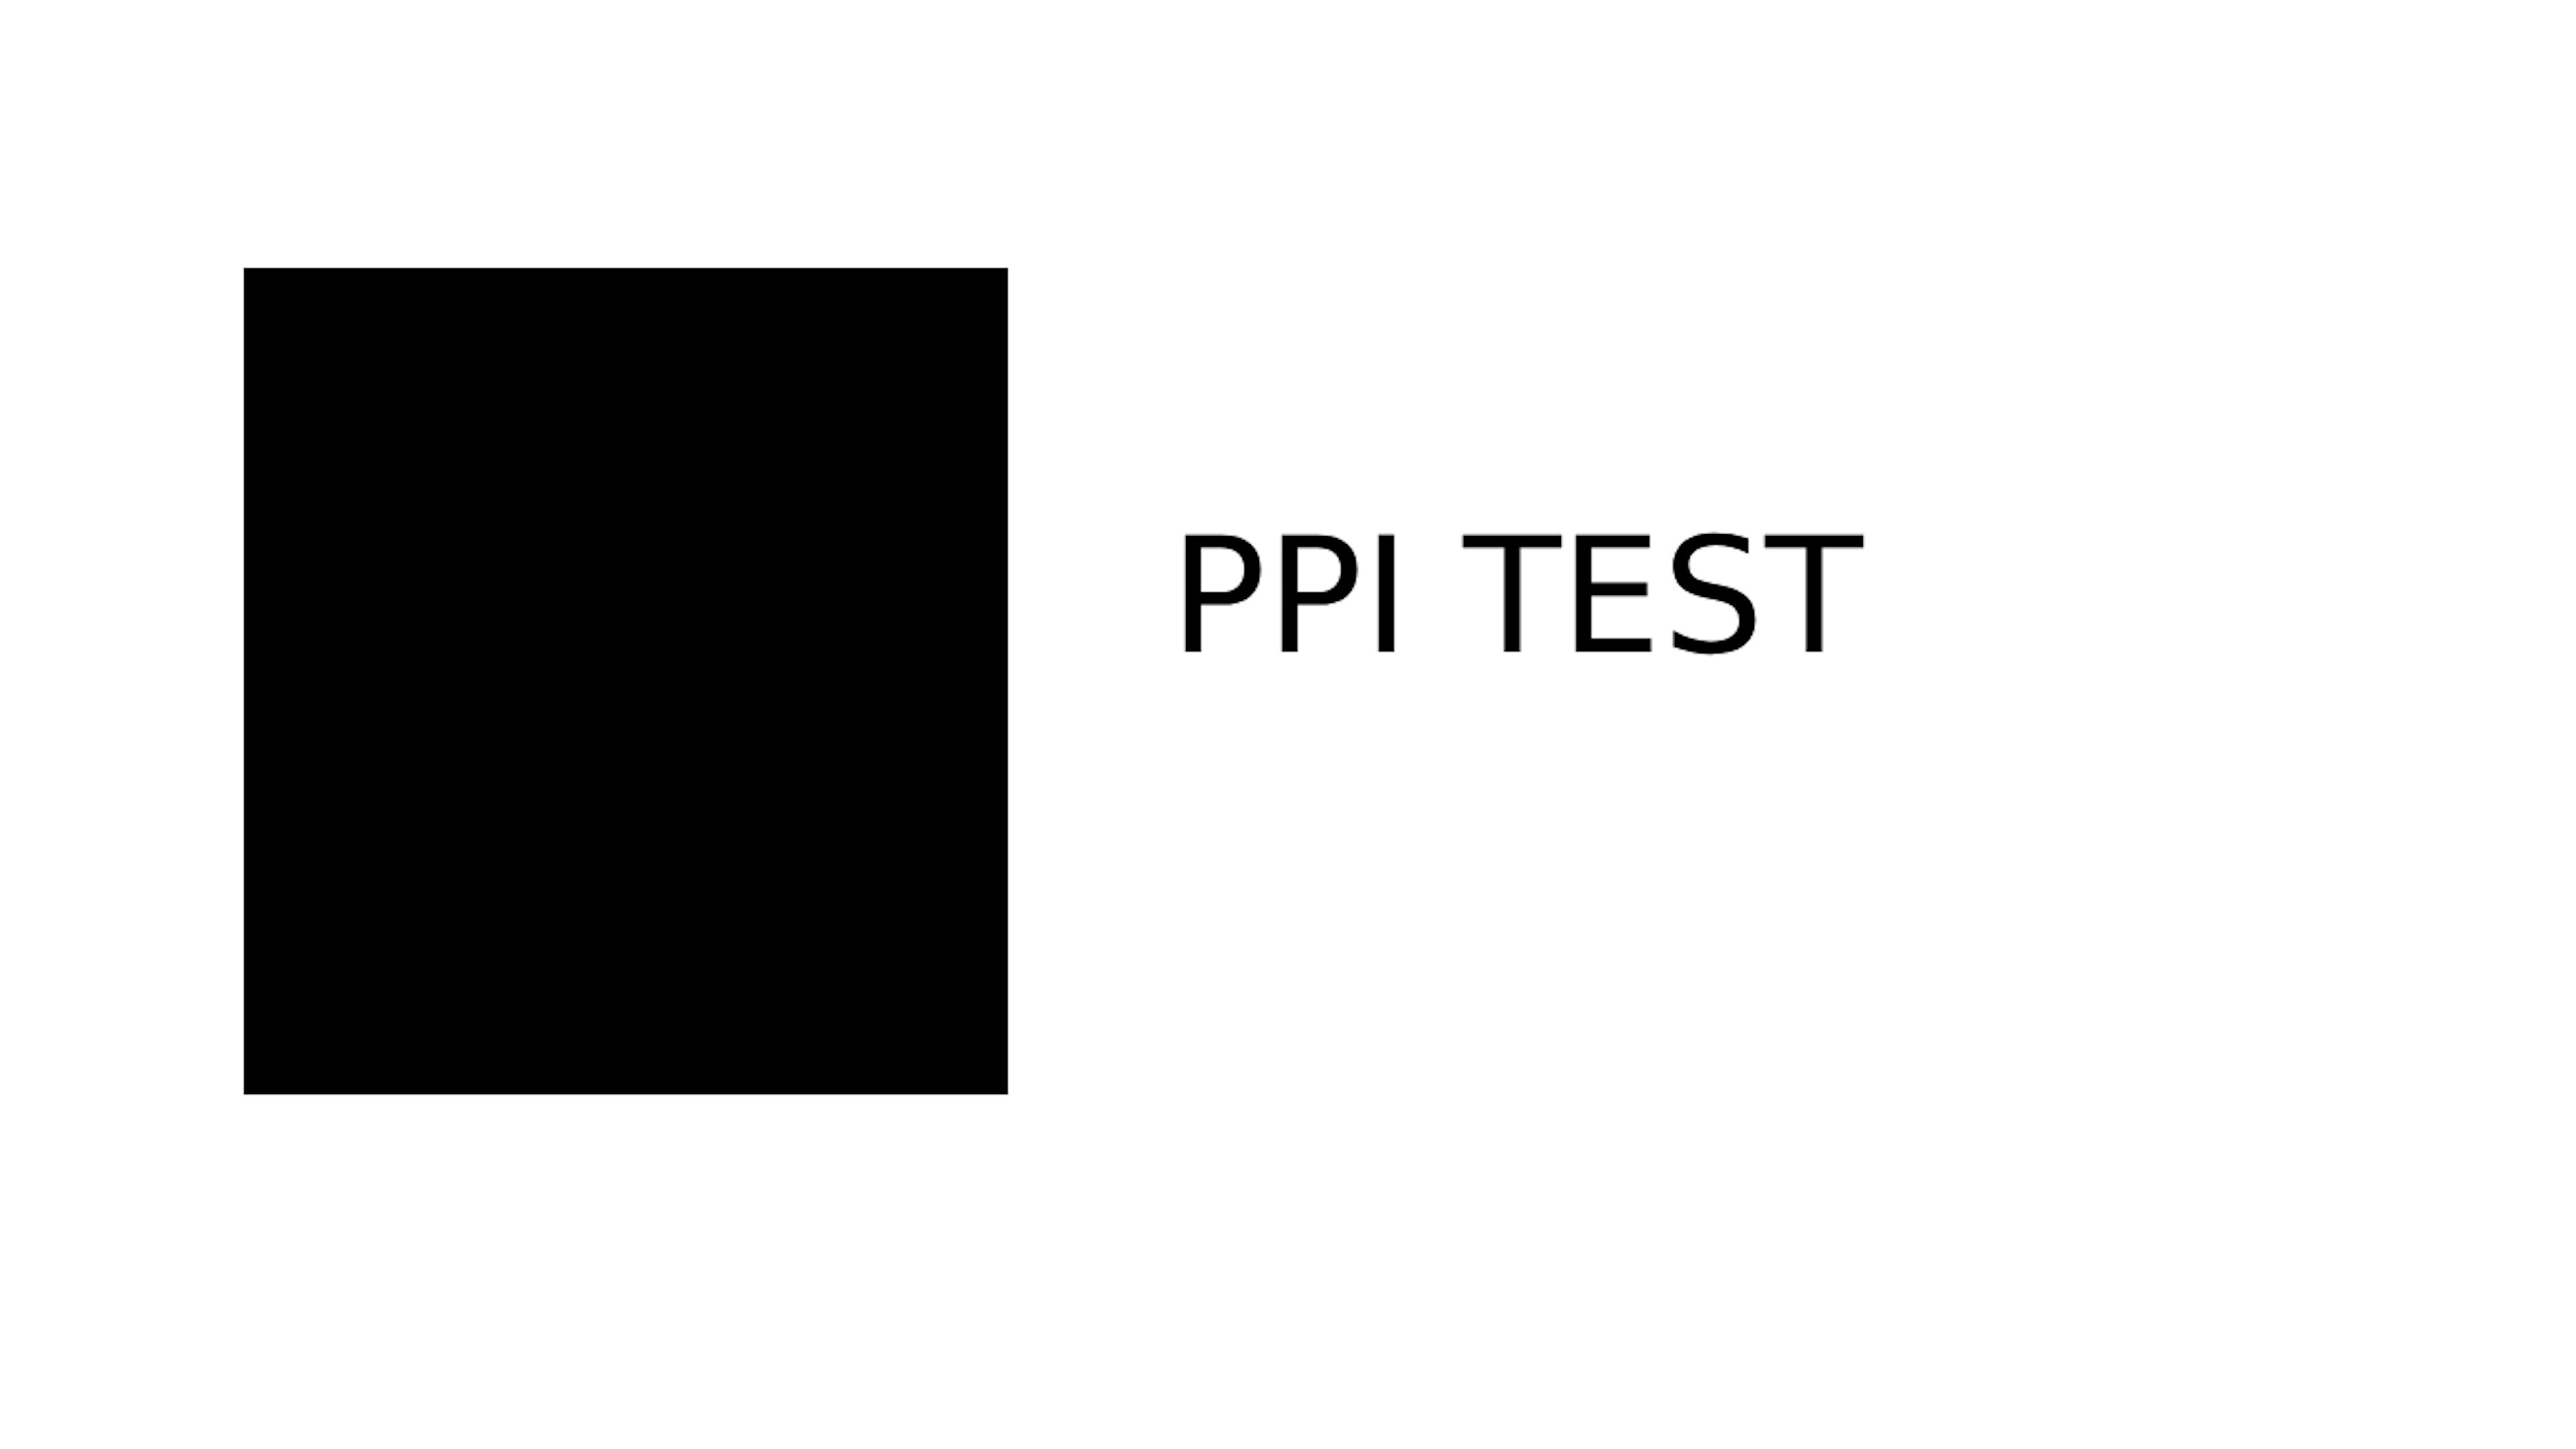
Preview rounded the off branch's width to 4.27 inches. The PNG density fields decode to approximately 99.9998 PPI for the baseline and 299.9994 PPI for both edited files, because PNG stores pixels per metre. The exported baseline and off files have identical decoded RGBA pixels after conversion to a common mode, even though their encoded bytes and color modes differ. We did not find new image detail by changing a density label.
Repeat the two branches without accidentally resizing
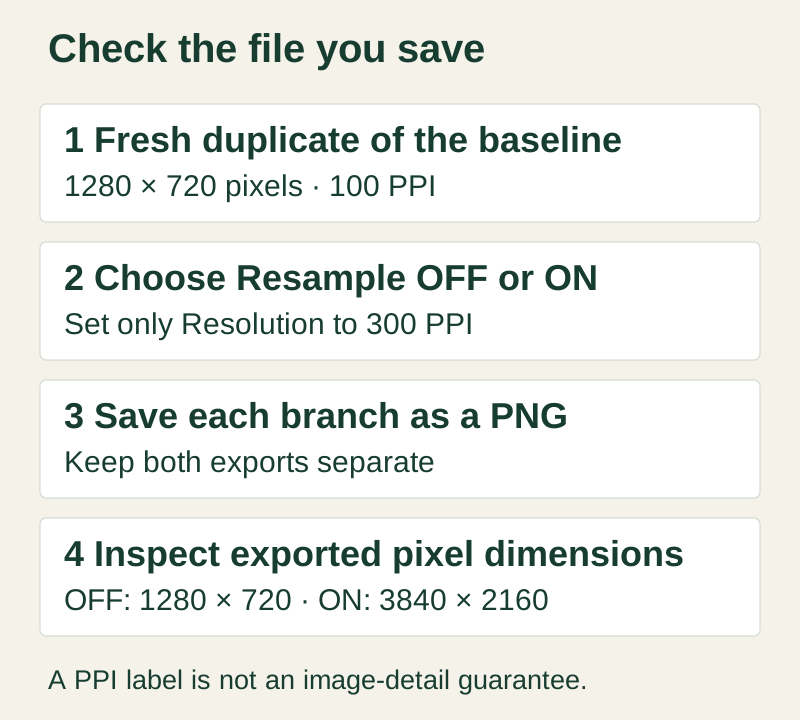
- Download the baseline PNG above and open it in Preview. Use a duplicate for each branch so the second test does not start from the first export.
- Open Tools → Adjust Size. Choose inches and confirm 12.8 × 7.2 inches at 100 pixels/inch.
- For the metadata branch, uncheck Resample image, then set Resolution to 300. The physical dimensions change to approximately 4.27 × 2.40 inches. Save the PNG and verify it is still 1280 × 720 pixels.
- Return to a fresh duplicate of the baseline. Check Resample image and Scale proportionally, then set Resolution to 300. In this test the inch dimensions stayed 12.8 × 7.2, and Preview displayed and exported 3840 × 2160 pixels.
- For a thumbnail workflow, inspect the actual output pixel dimensions before uploading. If you need different dimensions, set the pixel width and height deliberately; changing a print-density field is an indirect way to resize.
Download the measurements, file hashes and method · Download the read-only PNG verification script. The script requires Python 3 and Pillow; it reads the three downloaded PNGs in its own folder and does not resize or write images.
Limits: one synthetic design, one editor version, one PNG export per branch. We did not test YouTube uploads, its processing, screen appearance, printers or other editors. The 3840 × 2160 output was enlarged from a 1280 × 720 raster; meeting those dimensions does not recover detail absent from the source. The byte increase includes re-encoding and is not a sharpness score.
For the general distinction, see Apple's Preview image-size instructions and Adobe's resolution and resampling explanation. Adobe describes Photoshop; our numbers come from the Preview exports. YouTube's thumbnail guidance specifies pixels, not a required PPI. See the inch conversions below for arithmetic examples.
Why can a downloaded thumbnail have different dimensions?
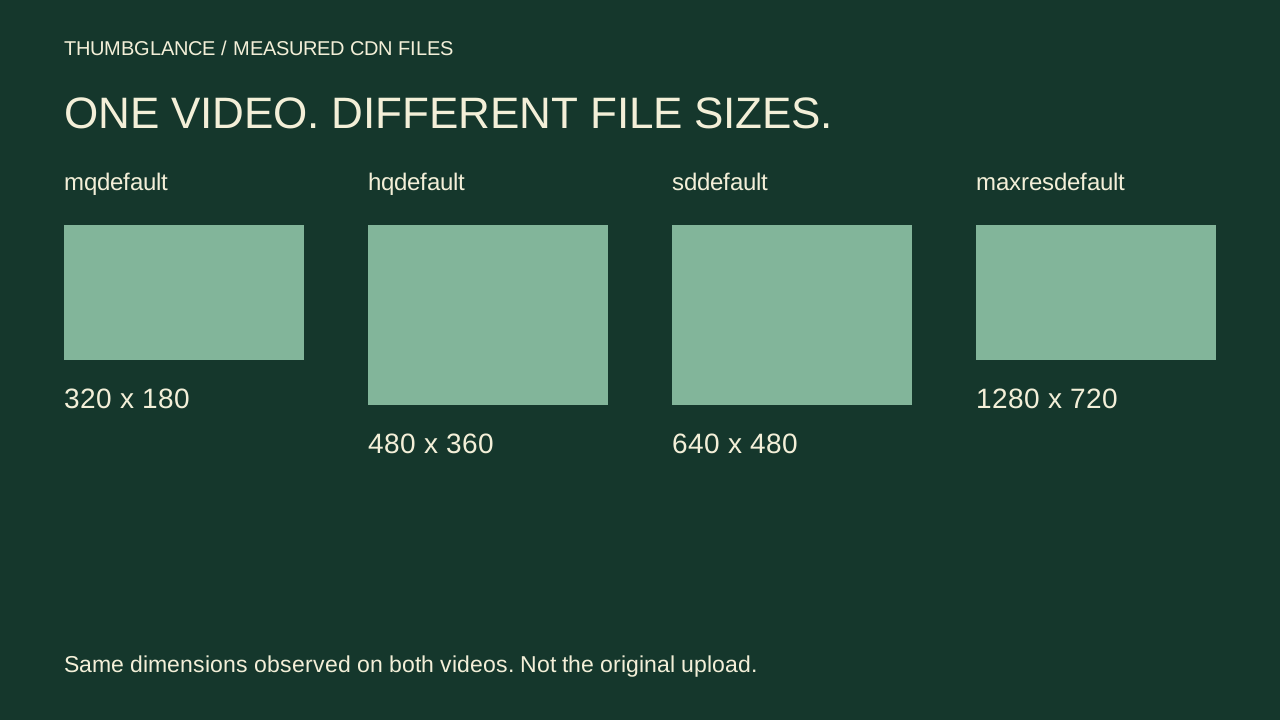
A downloaded thumbnail is a particular served file, not proof of the dimensions you originally uploaded. On September 26, 2026, we fetched five public thumbnail variants for each of two of our own videos. All ten responses decoded as JPEG images. The variants had the same pixel dimensions across these two videos, but different byte counts.
| Video / variant | Decoded pixels | JPEG bytes |
|---|---|---|
| jf5U0rfS7gI default | 120 × 90 | 2,700 |
| jf5U0rfS7gI mqdefault | 320 × 180 | 6,504 |
| jf5U0rfS7gI hqdefault | 480 × 360 | 9,725 |
| jf5U0rfS7gI sddefault | 640 × 480 | 34,647 |
| jf5U0rfS7gI maxresdefault | 1280 × 720 | 80,847 |
| dOtuo5qrnlE default | 120 × 90 | 1,727 |
| dOtuo5qrnlE mqdefault | 320 × 180 | 5,542 |
| dOtuo5qrnlE hqdefault | 480 × 360 | 8,507 |
| dOtuo5qrnlE sddefault | 640 × 480 | 35,050 |
| dOtuo5qrnlE maxresdefault | 1280 × 720 | 107,574 |
Does a 640 × 480 file mean the picture is meant to be 4:3?
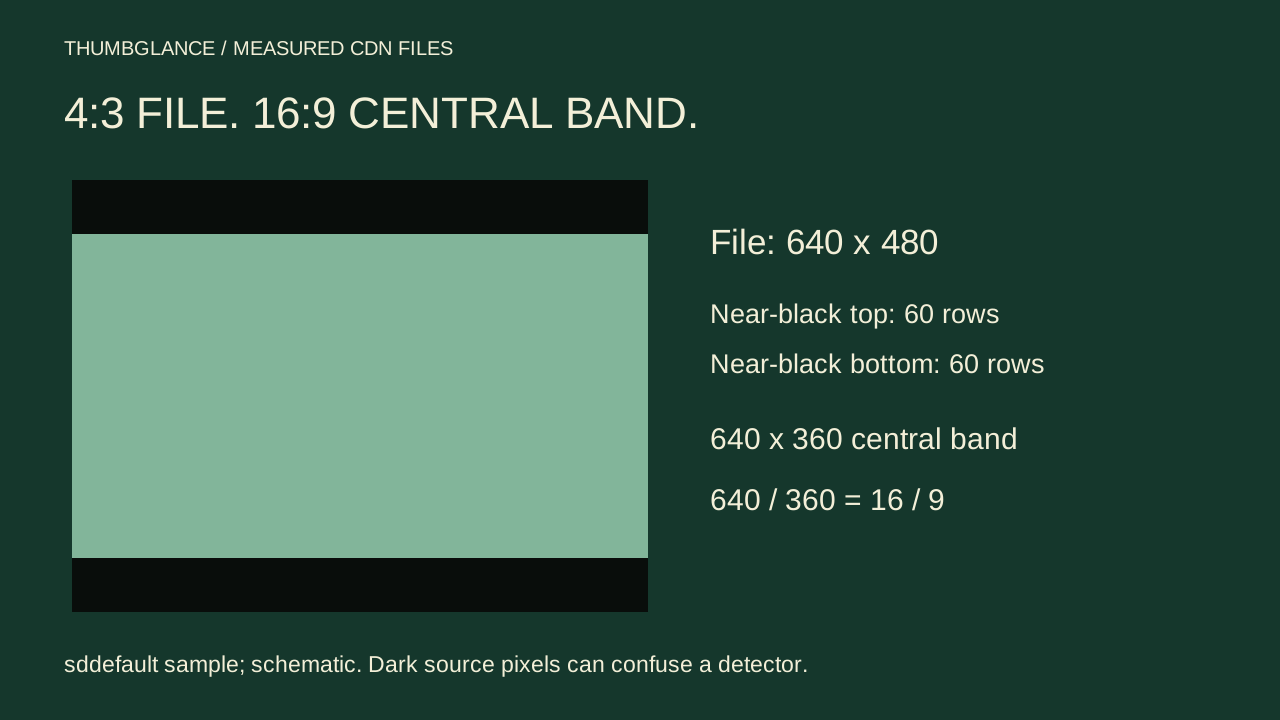
Not in these two samples. Each sddefault file had 60 near-black rows at its top and 60 at its bottom. Removing those measured bands leaves a 640 × 360 central rectangle: 640 ÷ 360 = 16 ÷ 9. The encoded file is 4:3, while the central rectangle is 16:9. Do not stretch the full 640 × 480 file to 16:9 to compensate: that also changes the picture inside it.
What should I check before re-exporting my design?
Inspect the actual downloaded pixels and compare another available thumbnail version. In our sample, mqdefault and maxresdefault were already 16:9 and had no near-black edge rows by our detector. Prefer your original design when editing. Enlarging a small served JPEG does not restore detail from the original, and the largest byte count is not a sharpness score.
We used public URLs of the form https://i.ytimg.com/vi/VIDEO_ID/VARIANT.jpg, checked HTTP status and Content-Type, decoded each image, and counted its actual bytes. The detector calls a row near-black only when at least 99% of its RGB channel values are below 16. For hqdefault it found 44 edge rows on each side of one sample and 45 on the other: that difference is a reason not to assume every file has identical padding.
Download all URLs, dimensions, bytes and SHA-256 hashes · Download the measurement script. The script requires Python 3 and Pillow, makes ten public network requests and writes cdn-measurements.json beside itself (this published snapshot is named measurements.json); server files may change on a later run. It does not upload anything or read private channel data.
Limits: two public videos, one retrieval date, five named variants each. This does not measure original upload dimensions, every device placement, the reason for YouTube compression, or click-through rate. Dark pixels in the artwork can fool the band detector; inspect before cropping. For upload recommendations use the official specifications above.
Conversions you can actually use
These are worked calculations, not additional YouTube requirements. The video dimensions and ratio come from the official table above; example inputs are labelled below.
Reduce width : height
For the recommended 4K YouTube thumbnail size, divide both dimensions by their greatest common divisor, 240:
3840 ÷ 240 = 16
2160 ÷ 240 = 9
3840 : 2160 = 16 : 9
To check another image without rounding, compare width × 9 with height × 16. Equal values mean an exact 16:9 ratio.
Find the missing pixel dimension
At 16:9, height = width × 9 ÷ 16. Using an example width of 1280 pixels:
1280 × 9 ÷ 16 = 720 pixels
For a 3840-pixel width: 3840 × 9 ÷ 16 = 2160. The first result is a calculated example, not the current official recommended resolution.
Pixels to inches or centimetres
To calculate a YouTube thumbnail size in inches, specify a pixel-density value. With an example density of 300 pixels per inch (PPI):
3840 ÷ 300 = 12.8 inches
12.8 × 2.54 = 32.512 cm
A second example at 96 PPI, for a 1280 × 720 image:
1280 ÷ 96 = 13.33 inches → 13.33 × 2.54 = 33.87 cm
720 ÷ 96 = 7.5 inches → 7.5 × 2.54 = 19.05 cm
Formulas: inches = pixels ÷ PPI; cm = inches × 2.54. One inch is exactly 2.54 cm by unit definition. 300 PPI is this example's input, not a YouTube rule. Pixel dimensions alone do not determine a physical size.
The real Preview test compares changing PPI with Resample off/on.
YouTube thumbnail upload size
Check YouTube thumbnail file size from the exported file's encoded bytes. For a YouTube thumbnail PNG, pixel dimensions alone do not determine whether it meets the upload limit for your device.
How many bytes is 2 MB?
In decimal units, 1 MB = 1,000,000 bytes, so:
2 × 1,000,000 = 2,000,000 bytes
Binary units differ: 1 MiB = 1,048,576 bytes, so 2 MiB = 2,097,152 bytes. These are unit definitions and arithmetic, not a measurement of YouTube's uploader. The cited YouTube page says MB but does not give an exact byte threshold or define its MB convention.
Our tester uses 2,000,000 bytes as a conservative interpretation of the mobile-video label. YouTube's own upload result remains authoritative. Pixel count does not determine encoded file size: check the actual exported bytes.
Downloaded pixels can differ from upload specifications
The file you retrieve from a video may be one of several served versions. Our two-video measurement found five different pixel sizes, including 4:3 JPEGs with near-black bands around a 16:9 central rectangle. These sample results are not new upload rules.
Put the dimensions to work
Preview your image across layouts, or resize it and inspect the actual exported file size.
Check your thumbnail →Resize your thumbnail →Profile picture size →
The resizer starts at a 1280 × 720 preset. Open it with the 3840 × 2160 video preset or 2160 × 3840 Shorts preset, or choose Custom dimensions for another placement. These explicitly resize your image; enlarging cannot recover missing detail.
Your image is processed in your browser and is never uploaded to any server.
Questions
What are the YouTube thumbnail dimensions?
For videos, 3840 × 2160 pixels at 16:9 with a minimum width of 640 pixels (YouTube Help, “Add custom thumbnails on YouTube”, read 2026-10-24 03:03 UTC).
What is the yt thumbnail size for Shorts?
2160 × 3840 pixels at 9:16, with a minimum height of 640 pixels (YouTube Help, “Add custom thumbnails on YouTube”, read 2026-10-24 03:03 UTC).
Is 1280 × 720 still the recommended size?
1280 × 720 is the historical recommendation and remains our resizer preset. It is 16:9 and above the current 640-pixel minimum width, but the current YouTube Help page recommends 3840 × 2160. The 1280 × 720 size was also the largest public image in our October 21, 2026 retrieval test; a served image does not identify the original upload size. Keep your original design.
Can I use a 1920 × 1080 thumbnail?
1920 × 1080 is 16:9 and exceeds the 640-pixel minimum width. YouTube's current guidance recommends 3840 × 2160 and does not specifically list 1920 × 1080. Check the encoded file size and format as well as the dimensions; meeting the width alone does not guarantee upload acceptance.
Is 640 pixels the recommended thumbnail width?
No. YouTube lists 640 pixels as the minimum width for standard video thumbnails, while recommending 3840 × 2160. At 16:9, 640 pixels wide gives 360 pixels high. A small source enlarged to a bigger canvas does not recover missing detail.
Are 1280 × 720 and 1920 × 1080 the same aspect ratio?
Yes: both are 16:9. They differ in pixel dimensions. Check shape separately from resolution and file size.
Can I turn a square or 4:3 image into 16:9 without losing anything?
You can preserve the whole composition by fitting it inside a 16:9 canvas and adding padding. Filling the canvas requires cropping, extending the design, or distorting it. These are different choices.
Why does my face look wider after resizing?
If width and height were scaled by different factors, the image was stretched. Use proportional Fit or Fill, then inspect the result.
Does 16:9 guarantee no crop anywhere on YouTube?
No. Upload guidance and display behavior are different. Layouts, vertical-video rules and interface overlays can affect what viewers see. Our tester is a simulation, not a live feed.
Does YouTube have a special A/B-test resolution rule?
Yes. YouTube's A/B testing help says that if any test thumbnail is below 1280 × 720, all thumbnails in that experiment are downscaled to 854 × 480. That rule describes its testing feature, not every thumbnail display. Source: YouTube Help.
Can changing DPI fix a low-resolution file?
The native-resolution experiment above compares pixel dimensions, not print metadata. Our separate PPI side study compares density tags while holding every pixel fixed. Changing a DPI label without changing the raster does not add pixels. Re-export from the original design when possible, then check the actual output at its intended display size.
Is 17.78 × 10 inches always the thumbnail size?
No. That calculation uses exactly 1280 × 720 pixels and 72 PPI. Different pixel dimensions or density assumptions give different physical dimensions. YouTube specifies pixels, not a fixed inch size.
What if my PNG has no density tag?
Its pixel dimensions still exist. You cannot derive a unique physical size without a density assumption. Our no-density sample has the same 1280 × 720 pixels as all four tagged copies.
Why did my saved PNG get larger when Resample image was off?
Encoded bytes are not a pixel count. In this one macOS Preview 11.0 test, the saved PNG stayed 1280 × 720 and its decoded RGBA pixels matched the baseline exactly, while the file bytes rose from 5,668 to 23,323 and the saved color mode changed from P to RGBA. More encoded bytes do not demonstrate added pixels or detail, and this experiment does not isolate PPI as the cause; the byte increase also includes re-encoding. Inspect your exported dimensions and bytes. Both numbers are in the Preview export test and its downloadable measurements file.